No English? No Problem!

Showing posts with label gettingcrafty. Show all posts

Saturday, March 11, 2017

Make Useful Stuff

Following up from the last post about how Creative Output must = Material Input, I managed to do a few more little projects with my junk, er, creative supplies. I happily cut and pasted to make some more art journal pages to my satisfaction. Then I wondered why did some of these make me feel so contented? Well, one reason of course is that I was starting to make some pages which I felt happy looking at. I liked the messages that I was writing and I liked the way it turned out so nicely.

This brought me to another thought, that when we make something creative, we should also

MAKE USEFUL STUFF

Now, some would interpret this as "It has to serve a practical purpose" but my definition is a bit wider than that. How would you know if something is useful? Ask yourself the following:

👍 Is what you made useful? Does it help you to do something or achieve a goal? 
One example of this would be the pen holders I made from old film cans. I needed something to hold small pens and the holders fit that purpose perfectly. It helped me to achieve the goals of organizing my desk, and being creative.


👍 Does it make you feel good, or 'spark joy' like what Marie Kondo describes in her book? Here as examples are 2 old art journal pages I did. They don't have any practical purpose. They don't act as storage, they're too big to use as bookmarks and too light as paperweights. I can't even write on them because they're no longer blank. Yet when I look at them, they remind me of important messages that I should carry through life. One is the obvious message that they carry and the other is that I am capable of making beautiful pieces if I just try. Certainly, when I look at them, they 'spark joy' in me. 


👍 Does it teach you something? Do you learn something out of it? This is one of my first attempts with watercolour painting:  
You can tell it's not good at all and you find any redeeming feature in it, you are a good, kind friend and I thank you. By all appearances, this particular painting does not serve any practical purpose. There's no inspirational message and in fact, it's kind of gloomy. Plus the technique really sucks.

But it did lead on to a later piece, which is this:
This is still not a fine piece of art but isn't it miles above the first in technique? That's the useful purpose of the first piece, not as a piece of art on its own, but as a stepping stone to a better piece. 

It was hard to grasp that some of the uglier stuff I did early on could serve any useful purpose at all. At times, it seemed impossible with the skills I had then that I could produce anything marginally useful. The key for me was not to dismiss my early attempts as proof that I totally sucked, but to see them as small steps to a bigger thing. Then it was easier to continue, because I saw myself en route to bigger things. 

This can be hard. Especially when you are faced with the shrapnel of all your failed attempts and a trash bin full of paper, the inspirational quotations about learning 99 ways how not to build a light bulb seem pretty shallow. Be kind to yourself and accept your own shortfalls and failures. Even if you don't churn out anything remotely useful or beautiful at the end of your life, you still would have learnt something you didn't before. That also makes it useful. 😉

Saturday, March 04, 2017

Creative Output must equal Material Input

Today, I started on one of my Big Hairy Audacious Goals, which was to clear and organize the journals on my table. This was an important and urgent goal, because

1. They were a disaster waiting to happen. 
The journals were in a precarious pile on the table and every time someone breathed near them, an avalanche occurred.
2. They were not in a convenient location. 
I wanted them arranged in a more accessible way that made sense for me. They were arranged in a huge stack on top of one another, and that certainly made it 'convenient' when the one I wanted happened to be, oh, right at the bottom.
3. They were mixed up with too much other junk. 
There were other stuff mixed up with the journals which I was not using. This included stationery, stickers, random pieces of paper, name cards, other homemade journals... 

All combined, the pile was long overdue for a decluttering a la Marie Kondo. As I started to clear the pile, I uncovered even more bits of paper and trash, resulting in another small scrap heap that I had to clear other than the journals. 😖 Some were easy, like outdated insurance letters dating back from 2008. Some were more difficult, like Christmas cards from close friends. *sigh*

One thing became clear though: My creative output was not equal to the material input that I had accumulated. For all the paper, stickers and junk I had kept, how much of it had actually turned into actual artwork? I had kept a lot of paper, thinking "This would come in handy if I wanted to...*insert craft project here*" but for work or some reason or another, I never got around to doing it and the materials just stayed there. Or I would buy new materials, thinking "I can use this if I... *insert new craft idea here*" but again, the materials stayed there. 

Even the things I used were also existing in surplus. I did more journalling in 2016 so I told myself I would allow myself to use whatever I had bought, without fear of failure. I wrote on my nice notepads, I tore things out of my Flow Book for Paper Lovers, I shrugged away the numerous mistakes I made, resolving to be more careful the next time, I gleefully tore out metres and metres of washi tape. 

And I still had tons of those materials. 😱 The things in my room seem like a neverending black hole of paper, washi tape and stickers. Made even worse by my seemingly bright idea to do a couple of projects with junk paper, which meant that I had also accumulated a small stack of junk paper from work...... 

I think I'm not the only person this has happened to. How many times have we bought something with good intentions, thinking that it will come in handy, or that it will help us to achieve some goal? Hands up all the guilty ones who have books unread (me), paints unused (me), clothes unworn, exercise equipment being used as clothes hangers and other things bought with good intentions in January only to be covered in dust by March. 

For me, the bottom line is clear. I bought these supplies to be creative, so be creative I must. That is,

my CREATIVE OUTPUT must = my MATERIAL INPUT

Everything I have now must be used, used and used even for what seems like the most frivolous of reasons. It doesn't matter even if I don't churn out the Mona Lisa from my supplies, what matters is that I use them to the best of my abilities and use them to improve my creative skills in whatever way possible. That also means that I will make mistakes and end up chucking away some hard-earned material. Take it as a lesson learned rather than a wasted failure. 

The funny thing is that during this month when I was doing that, somehow I started to improve in small ways. My brush lettering improved because I now had oodles of junk paper to practise on. My journalling started to look better when I used my coloured markers to write with and my washi tape and stickers to decorate. I even found some of my markers running out of ink, which was sad yet gratifying at the same time. 

So if there's one thing you have to remember:


This can be found on my Instagram (@khelath) 

We are not put on this earth to buy and accumulate things. We are meant to DO things. So if there's something around you that's accumulating, (like my craft materials) ask yourself why, and just DO something with it to get started. We are not buyers of life, we are DOERS. 

Tuesday, February 07, 2017

Junk Journals Tutorial 2: Part 2: Making a Book Cover

Hi all, sorry for the long break! We've been celebrating Chinese New Year here in Singapore and now that it's nearly at an end, it's time for me to finish up this tutorial too!

Today's tutorial covers how to make a cover for your journal and is very useful when you are making journals of your own. Once you have some simple steps mastered, the technique can be applied to making any kind of journal.

Making A Book Cover

You will need:

Tools and Materials
Paper (This would become your cover)
End Paper (Any kind of coloured paper, for the inside of the cover)
Adhesive
Bookbinding stapler (Or ordinary stapler and eraser, if you are following my alternative stapling method)

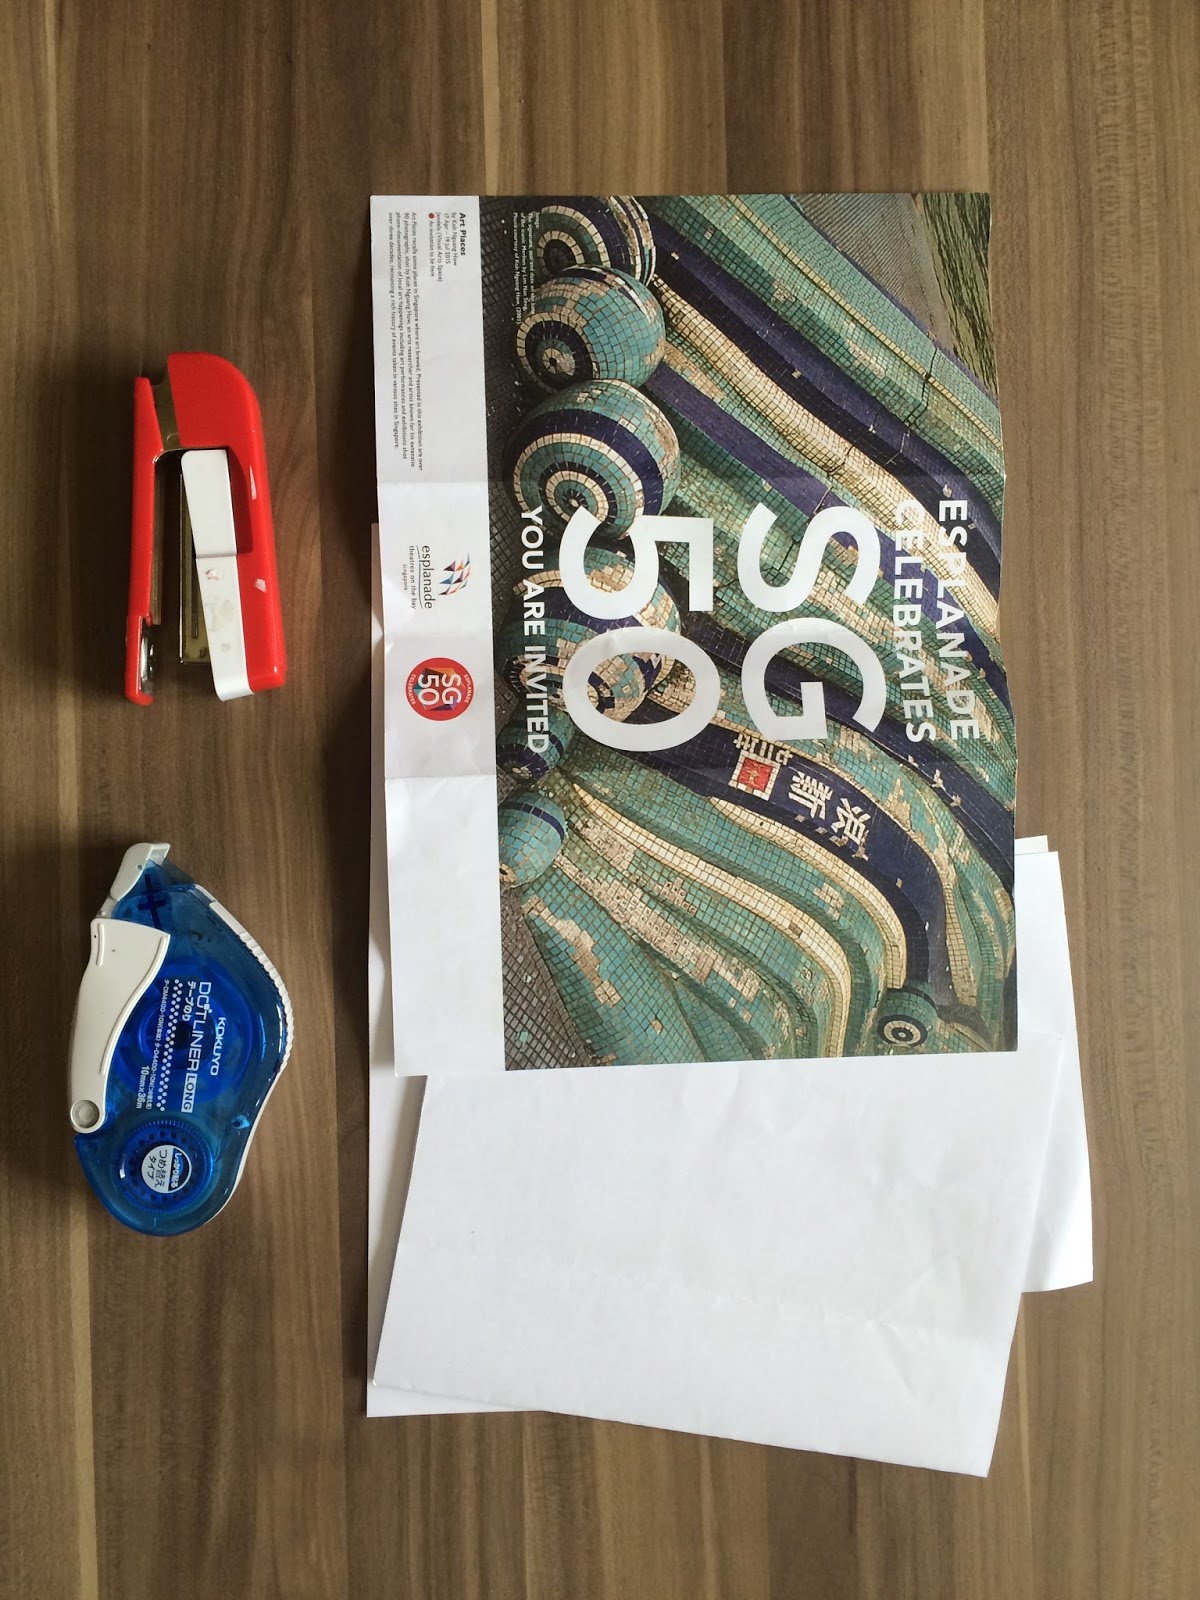
Here, for this tutorial, I have chosen a page out of Frankie magazine as the paper for my cover. The paper from this magazine is quite sturdier and after the end paper is pasted, will become strong enough to act as the cover.

Step 1: Fold the top and bottom edges of the magazine page to your required size. To gauge the size, I've put the paper from Part 1 on top. Leave a few millimetres allowance at the edges.


Step 2: Fold the right side down but cut the corners away. You should have something that looks like the picture above.

Step 3: Take away the notepaper. Stick the right side down. Then do the same on the left side. 


We're almost done. By this point, the top picture shows the inside of the cover and the bottom picture shows the outside after I folded it in half. 

Step 4: Open the cover and stick the end paper of your choice on the inside. Here I chose a piece of white paper to keep a clean look. This will also cover any ugly folding marks you made.

Step 5: Open the cover and open the notepaper to the centre. Clip the notepaper to the cover as if it were a finished book. The clips will keep the paper in place and make it easier to staple.

 Step 6: Turn the whole thing over and staple the paper to the cover.

Done! Here is the finished journal when closed and the tools I used!

Like I said, this tutorial is handy for making covers for any kind of journal or notebook, so save it and keep it handy!

Sunday, January 15, 2017

Junk Journals Tutorial 2: Part 1: Free paper is great!

Today's junk journal tutorial makes use of a free notepad I received from some sale or exhibition. ( I totally don't remember anymore, sorry! ) I love to get these because, er, I'm a bit of a paper junkie, but I don't always like the advertising that comes with it. However, it is always easy enough to use the paper to make a journal that you would like and the best thing is, it came free!

This is useful because at times, I come across lovely stiff paper in pamphlets or programme booklets. Although I would just love to make them into journals, I can't, because of all the words on them. So I keep (or hoard) free notepads and notebooks for this reason. 
This is a very easy tutorial to do and even if you have just one free notepad, it provides enough paper to make a number of journals.

The green and white notepad is the one I'm using. It comes from a property website but I don't want to be reminded of that whenever I use it. 

Using Free Paper

You will need:

Tools
Scissors
Bookbinding stapler 
or Stapler and Eraser combo (As written in Tutorial 1a)
Adhesive of your choice (I'm using glue tape which I bought from Daiso)

Materials
One free notebook/notepad
Old brochure (Choose one with hardier paper)
Paper (for cover. I used a page from Frankie magazine with a photo that I liked)

Steps:
1. Tear out your chosen number of brochure pages. Fold the brochure pages into half. This would form something that looks like a small book, on the left.  

2. Tear out a page from the free notepad and stick it on top of each page. You're done! 

Ok, obviously you would be expecting a bit more than that. Now chances are, like me, your free notepad paper will not fit your brochure paper and you will see some words or pictures sticking out the top. To counter this, I explored a few ways to decorate the pages. If you used a brochure with nice pictures, you probably won't have to read the following (but please do, anyway). But if you used one with boring words like me, then here's some decorating ideas:

(Note: Where possible, I have included links to the companies that produce the materials I used. If I didn't, it means I either bought them cheaply or I have totally forgotten where they came from.) 


Most cheapo method: Use marker pens to colour a design at the top. Here I opted for a simple rainbow design. You can also substitute the marker pens for other art mediums of your choice, like watercolours. 


Washi tape: Stick your favourite washi tape over the uncovered parts. Tape bought from MT tape.


Use a stamp of your choice and stamp it repeatedly. Here I used an awesome one from Typo stationery. 


Cut scraps of paper from previous scrapping projects and paste them at the top. This paper was from a Flow Book for Paper Lovers while the one below was from a paper pad from Popular Bookstore. You can also use scraps of pictures from magazines or newspapers or brochures. 


When you are done, staple the pages together using a bookbinding stapler or my alternative stapling method.
When you are done, you will end up with a nice set of stapled pages ready to be journalled in! But nice pages need a nice cover to hold them all together, no? We will cover that in the next tutorial! See you then! 

Thursday, December 22, 2016

Junk Journals Tutorial 1 (easy) : The Rough and Dirty Journal

In my past 2 chapters, I covered the why of making Junk Journals and what materials and tools you'd need to get started. Now let's start with an easy tutorial. 

This journal is one of the easiest to get started with, especially if you have the bookbinding stapler I mentioned in Tools and Materials. (If you don't, you can substitute it with other tools. I'll explain later in the post) It will also give you a peek into simple bookbinding. I call it the Rough and Dirty Journal because here we are not so concerned about making it look nice and polished yet so it's going to look a little rough around the edges. However, it's one of the easiest to do if you want to just get started.

Tutorial 1: The Rough and Dirty Journal

You will need:

Tools:
Bookbinding stapler 
(If not, needle and thread or tape)
Adhesive ( I like to use the adhesive tape shown in blue but you can use a glue of your choice )

Materials:
Junk paper (Ensure you have an even number of pages)
1 brochure (For the cover)


Step 1:
Arrange the junk paper together so that the written sides face each other.


Step 2: Use your adhesive to stick both sides together. You should end up with a slightly thicker sheet of paper that is blank on both sides.

Step 3: Arrange your pages together with the brochure on top. Here I have chosen an old programme sheet. Get your stapler ready.

Step 4: Fold everything in half to get a centre fold. Here, you can roughly see what your journal will look like.

Step 5: This is where the beauty of the bookbinding stapler comes in. Open the pages again and flip out the stapler. Then align it where the centre fold is before stapling.

This is a close up of the centrefold. You can see that after that is done, the pages have been stapled very nicely, like a magazine.

Repeat with one more staple on the other side and you are done! Very easy, isn't it?

This journal is still blank, but if you want to see what one looks like after I wrote in it, you can see this previous post on a Rough and Dirty journal that I already did and filled with writing.

Questions! Questions! 
So I know there will be some questions and comments on your mind, let me try to answer as many of them here.

- If you don't have the stapler I used, you can also use a needle and thread and do a basic stitch along the spine to achieve the same look. Also, you can use tape to tape the pages together. 

- If you want a more finished and polished look, you can also trim the edges of the white paper so that they don't stick out of the cover. (But hey, it is a rough and dirty journal after all...)

- For a hardier cover, use a brochure that is made of thicker cardboard or thicker paper. Alternatively, stick the brochure onto another piece of junk paper. 

More questions? Comments?
Leave them in the comment sections below and I'll get back to you as soon as I can! (Be nice, be constructive and I will do the same for you)

Did you try it out? 
I would love to see what you did with your own journals too. If you would like to share, email photos of your journal to me. Remember to include your name, country (optional) and email address so that I can credit your work here!  

Wednesday, November 30, 2016

Junk Journals

I've been making recycled paper journals, since it's that time of year where we have to move cubicles at work, and inevitably, there are tons of paper we have to throw or recycle. I sometimes feel a bit of a heartache when I have to do this, because I'm a paper junkie and I always felt like there was more I could do with the paper. Also, there were worksheets were I didn't use both sides of the paper and the blank side always held so much... potential. Yes, paper junkie >-<!!! 

Then I had the idea to try making recycled paper journals, or junk journals. Not that I put nothing but junk inside, but to use the paper which would have been junked, to make journals. At least if I managed to get one more use of the paper, I would feel *slightly* better about the environment and also maybe I won't have to buy any more notebooks for the rest of my life! Lastly, I would also be able to exercise some creativity in decorating the notebooks and *finally* depleting my stash of craft paper materials. 

Making the junk journal was easy. I planned a daily journal for November as a trial, then I chose some junk paper and stapled them together. After that, I decorated the pages with the layouts I wanted and finally, I filled in my daily entries.

Here's the result for November: 
(Note: Where possible, I have tried to include the sources for my materials, but unfortunately, I can't remember all of them, so if anyone recognizes them, let me know and I will put the sources in!)

Cover: Flow Book for Paper Lovers

Credits: Kikki.K 3AM notepad and Paperstone.sg to-do list

Credits: Ameba stuff My really busy week memo mousepad

Credits: 3M washi tape, Flow Book for Paper Lovers paper. Calligraphy stickers I bought from a flea stall but unfortunately, lost the lady's contacts -_-!!!

Credits: Paper on left from Daiso, on right from Kikki.k. 

Overall, I am pleased with how the results turned out, but I am also aware that it's not really recycling in the truest sense. I only managed to make such nice layouts because I had the nice paper in my house all along. The next step in this challenge for me, thus, is to make one without nice paper and to start from scratch. 

Still, if you are a paper junkie like me, and you also have a sizable stash of craft paper, this is something easy you can do to use your stash for a worthy cause. If you just have to have nice paper, Daiso sells a good range and for SGD$2, you can buy enough paper for a month. For a year's worth of journal entries, that will cost you around $24, which is cheaper than a Moleskine but you might still get cute diaries cheaper than that, so weigh the costs and decide if it's worth it for you. 

Sunday, July 17, 2016

Refillable Junk Mail Journal

I have a love of paper and journals and I can't deny it. Yet, I'm growing more hesitant to buy journals, no matter how beautiful they are. Firstly, I can't fill them all fast enough. Secondly, there seems to be so much paper floating about that to contribute to that seems wrong somehow. Every week I get sent letters from insurance companies, bank statements that I only need to read once and other mail congratulating me on receiving this wonderful opportunity to...... you get the idea. 

So why not make something that satisfies the need to craft, makes use of all that junk mail and also land you with a nice new journal at the same time? Have I got your attention yet? Hahaha...

This journal is more like a small holder. You can fold A4 letters in half and slide them into the flaps to form the notebook. I have made a version of this journal with sturdy envelope packaging, but this time I started with brochures and pamphlets. I used patterned endpaper for the inside covers that I bought from Daiso, part of my 'stock'. It is easy to make if you can understand my crummy instructions... -_-!!!

Refillable Journal

You will need:
- One large brochure (for the front and back cover)
- At least 2 pieces of card (I used theatre flyers)
- A piece of paper for the inside cover
- Scissors
- Glue
- Stickers to decorate (optional)

Steps
1. 
Place a piece of A4 junk mail on top of the brochure. Fold the long edges of the brochure inwards to fit the junk mail. Leave around 2-3mm allowance so that you can put more junk mail inside. Take note of which side you will use for the front cover, especially if there's a particular picture you want. 

2. 
Fold the junk mail and brochure in half. You will now have a centre fold for the brochure and the junk mail. Now fold the short edges inwards. Again, leave 2-3mm allowance for more paper in the future. 

3. 
Remove the junk mail and paste the pieces of card inside. This is to strengthen the covers. Leave a space in between the cards for the spine. Your cover will then look like the picture on the right. 

3. 
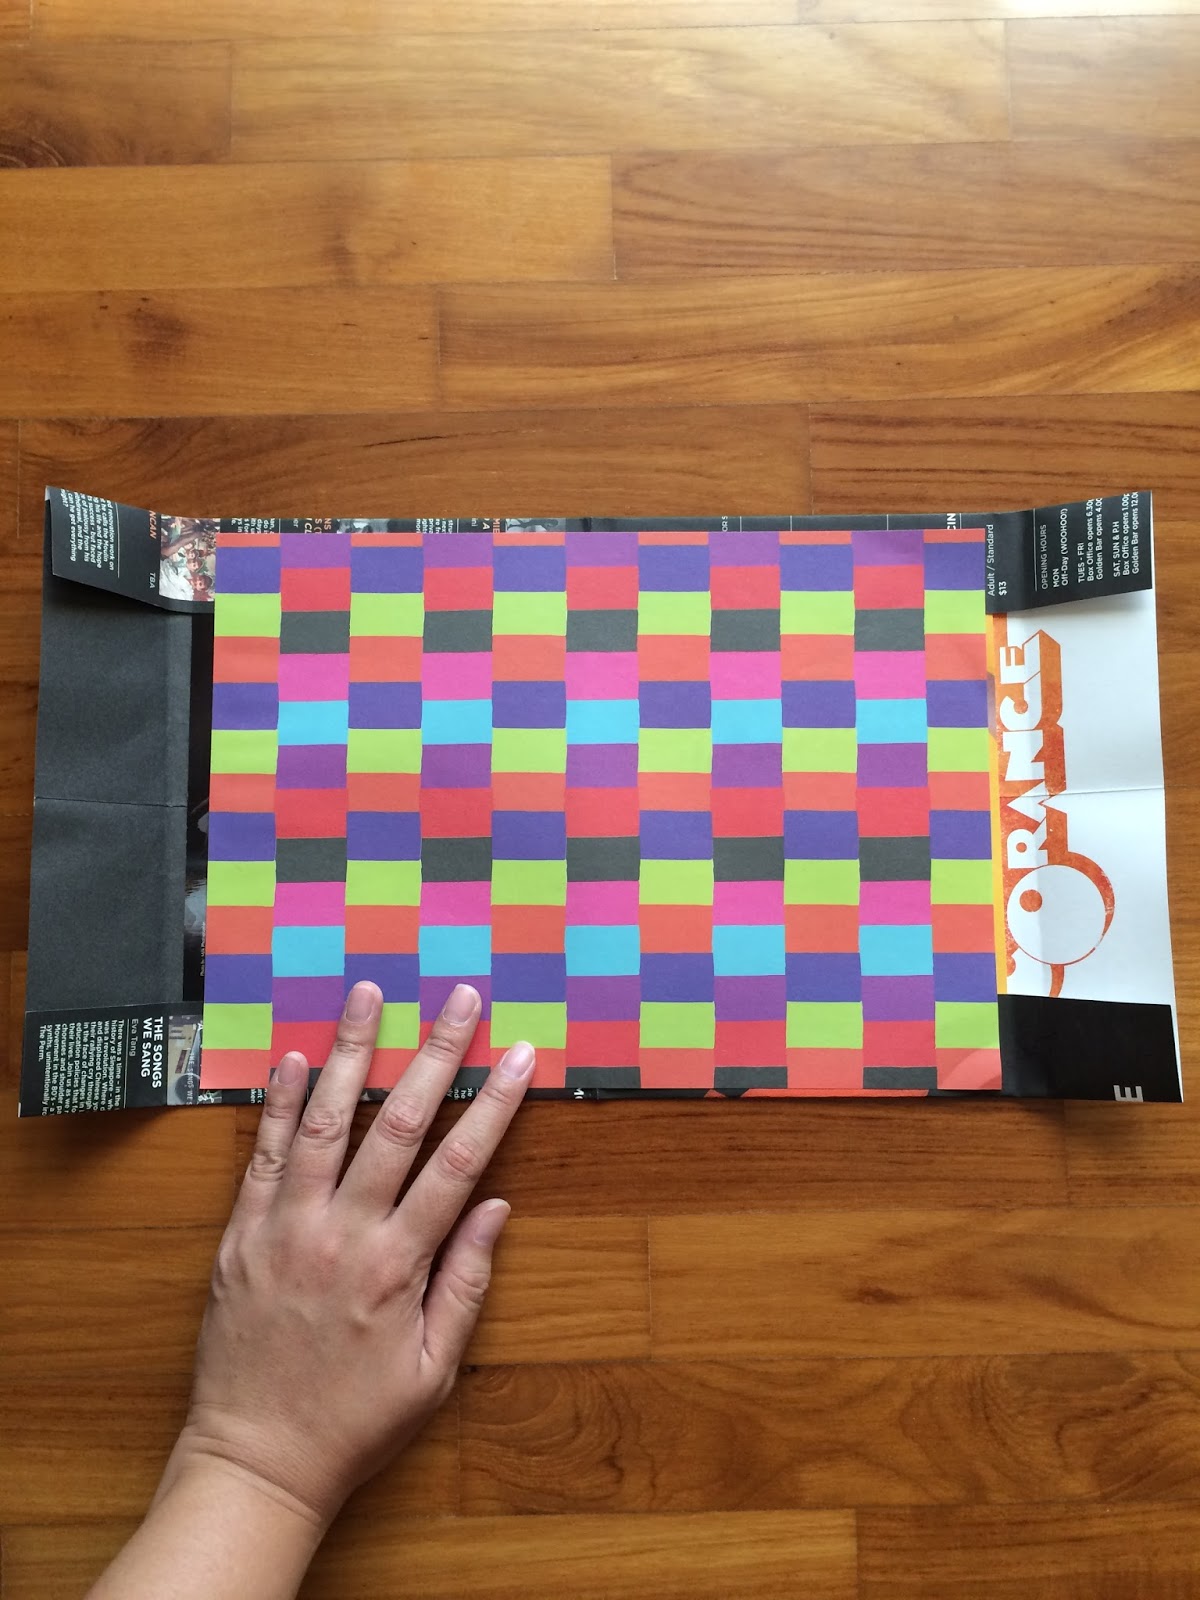
Paste your patterned paper on top of the cards. I used my existing stock of paper but if you want to more eco-friendly, use another brochure. 

4. This part is where you will be making the pocket for the paper. Bear with me, because this could be a bit tricky for me to explain, but basically, you are making a pocket to slide in papers. Use the side where your back cover will be. 

First, fold the short edges over the card. Then make another fold around 5mm away. Unfold the brochure and make 2 cuts where you folded it to the edge of the journal. It should look like the picture above, with one skinny bit and one fat bit to the left. 

Take the fat bit and unfold it. Then make another fold 5mm away. You should see 2 fold lines like what I have.
Fold it down so it looks like a little pocket. Apply glue to the flap, where my finger is pointing. Do the same to the other side.

5. 
Once you have applied glue to both flaps, fold them down. You should now have something like a little folder, and when you close it, it should look like the pictures below. 


6. You are nearly done! Slide in some paper like what I have done and make a victory sign! When you receive more junk mail, just slide it in. 
 Decorate with stickers if you fill the need.

And now, you can learn from my mistakes/observations...

What I learned:
- Leave more paper on the side to make a big pocket, especially if you intend to put more papers in or if you receive a lot of mail.
- You can also keep the papers in place by looping a rubber band or piece of string along the spine. I didn't because I was afraid it would crush it. 
- You can also use letters with text. Apply gesso or white acrylic or paste blank sides on top to reuse them.
- Don't, for the love of administration, use important documents like current bank statements or policy statements or your birth certificate. 

Have fun, people! If you did try this, post the photos of your journals in the comments!

Sunday, May 22, 2016

Craft: Notepad holder

I have a secret guilty pleasure: I like notebooks. I especially love those with blank empty pages because they feel full of potential to become full of well-drawn sketches and interesting ideas, whether or not I actually manage to fill them up!

From a love of notebooks, one day, I discovered the art of bookbinding and realized another thing: Instead of buying notebooks and collecting them, I could make them for myself! What a brilliant thing! 

So every now and then, I experiment and try my luck with scrap paper and cheap notepads. Sometimes I have total disasters that I have to throw, sometimes I land up with something that just maybe is usable and sometimes, I have a success!

This one I made is closer to a success. I thought of doing a notepad holder because I have a bunch of A6 notepads which are easier to carry around than my larger journal, and I also thought they would look nicer in a holder that I could re-use every time the paper ran out. I have a bunch of paper and thin card and I had a Typo envelope that I liked the look of, so why not? 

I finished this in one afternoon (with one loooong break in between for lunch and shopping) and I'm quite happy with the result. It looks nice and because I used more cardboard, it's stiff enough to hold the notepad without bending. Also with the elastic band, I can take out the notepad and change it with a new one when the paper runs out.

And so, the instructions!

Crafting a Notepad Holder

You will need: 
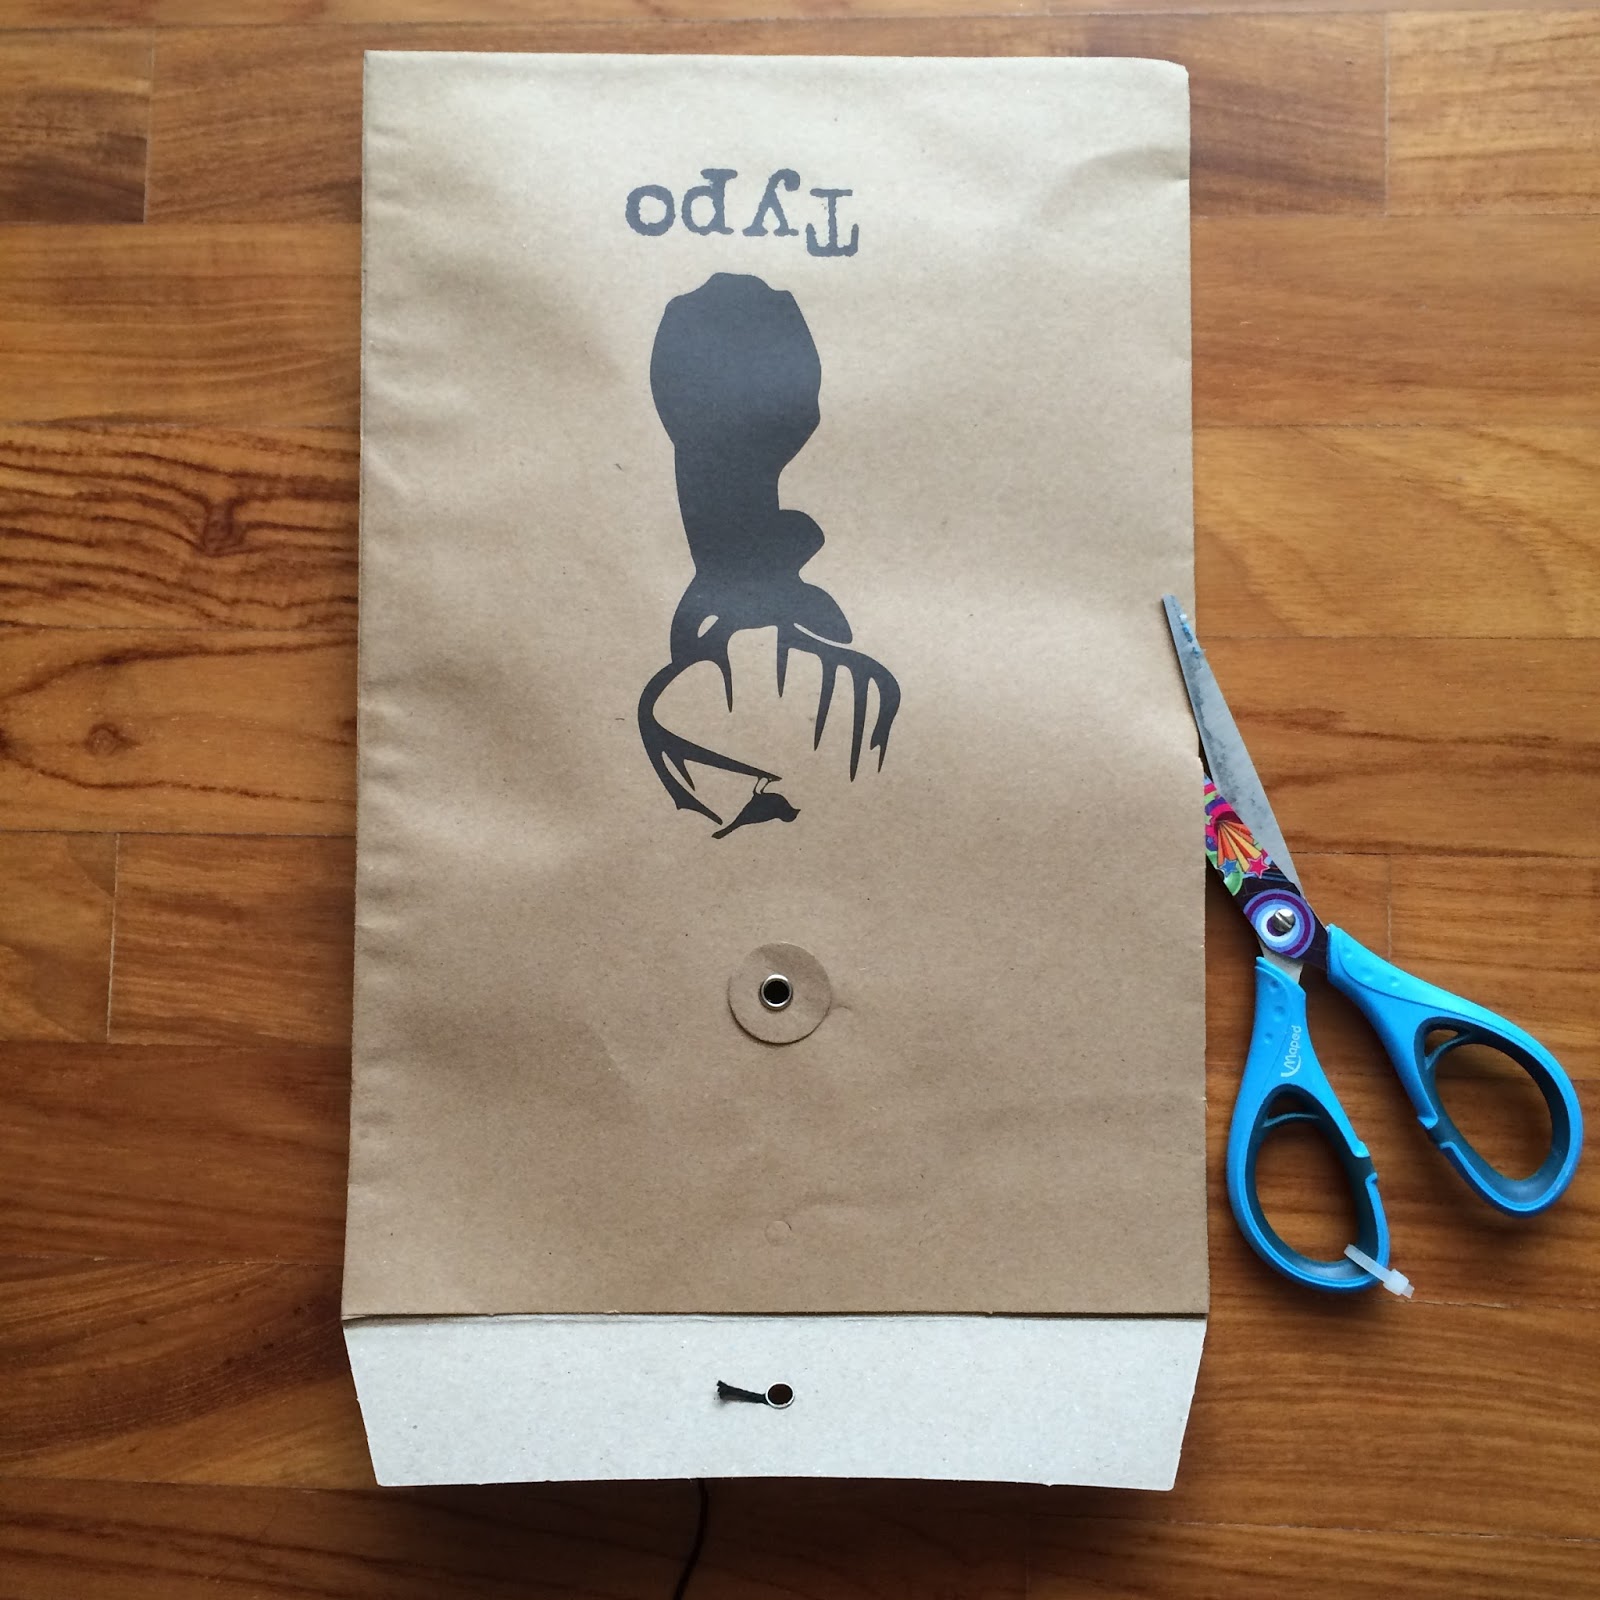
Paper for the cover (I used a Typo envelope)
Paper for the inside cover (mine is a striped pattern, from a book I got from Daiso)
Thin cardboard (I used free flyers)
An elastic band (you can buy a packet from Daiso)
Scissors
Glue
Stapler or needle and thread

Instructions:
 
1. Measure the flyers and cut them to fit your notepad. ( I was lucky because the flyers I chose were just half a inch larger than my notepad, so no cutting here for me ) Then stick them together so that they are as hard as a paperback's cover. ( I used two, but if you have good quality cardboard, you could probably just use one.) Since I used two pieces of different sizes, I also cut the four corners off so I could fold the edges down. I felt this would give the edges extra strength.


2. Cut the envelope and choose one side to be the front cover. Then put it down facing downwards and lay the cardboard on top. Fold down the edges and glue them down. The cardboard will add strength to the holder.


3. Take the coloured paper for your inside cover. Measure it so that it fits and paste it down. If the front cover is longer like mine is, fold the edges inward like in the 2nd picture.


4. To attach the notepad, I stretched a piece of elastic across the notepad so that I knew how long a piece I needed. I then cut it off and because I'm a lazy boredslacker, I stapled the elastic to the cover. More hardworking types can use needle and thread to sew it on. 


The finished notepad holder, from the outside and the inside with the notepad inside. For a personal touch, I took some excess paper that I had cut off for the inside cover and pasted it on the outside. 

Looks great in pictures, but mind you, I did not show you:
- The mess of paper and stationery strewn around me on the floor
- My intense concentration when cutting and measuring and praying that I didn't do something wrongly
- Me having to stop every 10 minutes to position the materials nicely so that I could take a shot for the blog
- My irritated grunts when I found out I had stapled the elastic band wrongly and had to take out the staples
- More grunting when I was done and had to clean up the mess
- The holder doesn't close snugly so to close it, I had to loop an elastic band around it

Still, I do think it looks good. Can't wait to fill this with well-drawn pictures and interesting ideas. ( fingers crossed )