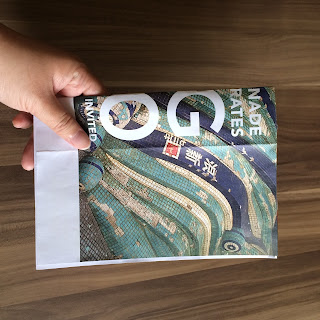
This journal is one of the easiest to get started with, especially if you have the bookbinding stapler I mentioned in Tools and Materials. (If you don't, you can substitute it with other tools. I'll explain later in the post) It will also give you a peek into simple bookbinding. I call it the Rough and Dirty Journal because here we are not so concerned about making it look nice and polished yet so it's going to look a little rough around the edges. However, it's one of the easiest to do if you want to just get started.
Tutorial 1: The Rough and Dirty Journal
 You will need:
Tools:
Bookbinding stapler
(If not, needle and thread or tape)
Adhesive ( I like to use the adhesive tape shown in blue but you can use a glue of your choice )
Materials:
Junk paper (Ensure you have an even number of pages)
1 brochure (For the cover)
Step 1:
Arrange the junk paper together so that the written sides face each other.
Step 2: Use your adhesive to stick both sides together. You should end up with a slightly thicker sheet of paper that is blank on both sides.
Step 4: Fold everything in half to get a centre fold. Here, you can roughly see what your journal will look like.
Step 5: This is where the beauty of the bookbinding stapler comes in. Open the pages again and flip out the stapler. Then align it where the centre fold is before stapling.
This is a close up of the centrefold. You can see that after that is done, the pages have been stapled very nicely, like a magazine.
Repeat with one more staple on the other side and you are done! Very easy, isn't it?
This journal is still blank, but if you want to see what one looks like after I wrote in it, you can see this previous post on a Rough and Dirty journal that I already did and filled with writing.
Questions! Questions!
So I know there will be some questions and comments on your mind, let me try to answer as many of them here.
- If you don't have the stapler I used, you can also use a needle and thread and do a basic stitch along the spine to achieve the same look. Also, you can use tape to tape the pages together.
- If you want a more finished and polished look, you can also trim the edges of the white paper so that they don't stick out of the cover. (But hey, it is a rough and dirty journal after all...)
- For a hardier cover, use a brochure that is made of thicker cardboard or thicker paper. Alternatively, stick the brochure onto another piece of junk paper.
More questions? Comments?
Leave them in the comment sections below and I'll get back to you as soon as I can! (Be nice, be constructive and I will do the same for you)
Did you try it out?
I would love to see what you did with your own journals too. If you would like to share, email photos of your journal to me. Remember to include your name, country (optional) and email address so that I can credit your work here!


No comments:
Post a Comment