No English? No Problem!

Wednesday, February 15, 2017

The Story of 2 Journals

This is the story of 2 journals. 

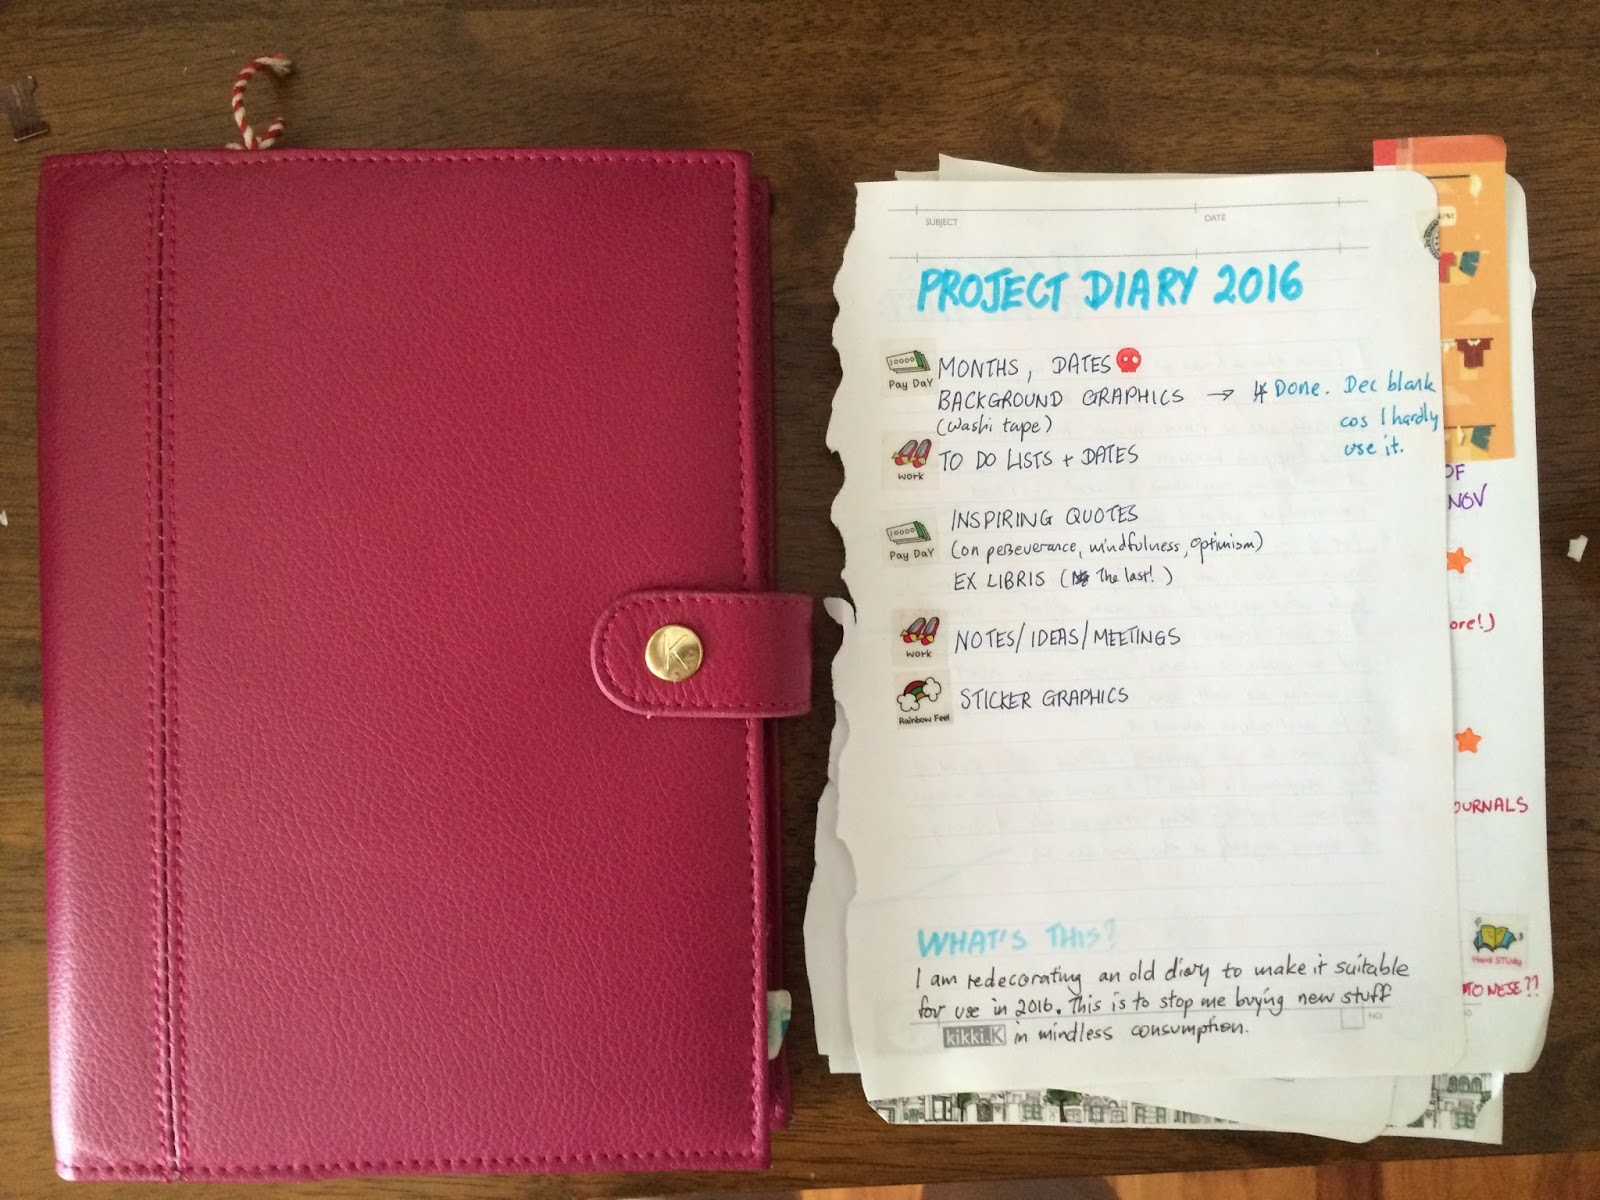
The one on the right, labelled "It's gonna be okay", was bought when I was going through a low time of my life. I seemed to be screwing up all the time at work, even when I was trying my best, and I felt like I was alone and had nobody. I bought the journal to rant, basically, to release all the excess toxic thoughts and to help me think a way through. 

The '16' journal on the right has a different story. It was given by a friend who had no use for me and ironically came a year late. (It really is a 2016 diary.) I loved all the cute illustrations inside and I thought it looked so happy, it ought to be a Happy Book. I started writing about happiness and all the little things that made me happy. 

After I started in it, I remembered the other journal and I took it out. The person who wrote those words inside seemed so far away from the person writing inside the Happy Book. I couldn't help but wonder: which journal would fill up first? Perhaps only time and my own efforts can tell. 

Tuesday, February 07, 2017

Junk Journals Tutorial 2: Part 2: Making a Book Cover

Hi all, sorry for the long break! We've been celebrating Chinese New Year here in Singapore and now that it's nearly at an end, it's time for me to finish up this tutorial too!

Today's tutorial covers how to make a cover for your journal and is very useful when you are making journals of your own. Once you have some simple steps mastered, the technique can be applied to making any kind of journal.

Making A Book Cover

You will need:

Tools and Materials
Paper (This would become your cover)
End Paper (Any kind of coloured paper, for the inside of the cover)
Adhesive
Bookbinding stapler (Or ordinary stapler and eraser, if you are following my alternative stapling method)

Here, for this tutorial, I have chosen a page out of Frankie magazine as the paper for my cover. The paper from this magazine is quite sturdier and after the end paper is pasted, will become strong enough to act as the cover.

Step 1: Fold the top and bottom edges of the magazine page to your required size. To gauge the size, I've put the paper from Part 1 on top. Leave a few millimetres allowance at the edges.


Step 2: Fold the right side down but cut the corners away. You should have something that looks like the picture above.

Step 3: Take away the notepaper. Stick the right side down. Then do the same on the left side. 


We're almost done. By this point, the top picture shows the inside of the cover and the bottom picture shows the outside after I folded it in half. 

Step 4: Open the cover and stick the end paper of your choice on the inside. Here I chose a piece of white paper to keep a clean look. This will also cover any ugly folding marks you made.

Step 5: Open the cover and open the notepaper to the centre. Clip the notepaper to the cover as if it were a finished book. The clips will keep the paper in place and make it easier to staple.

 Step 6: Turn the whole thing over and staple the paper to the cover.

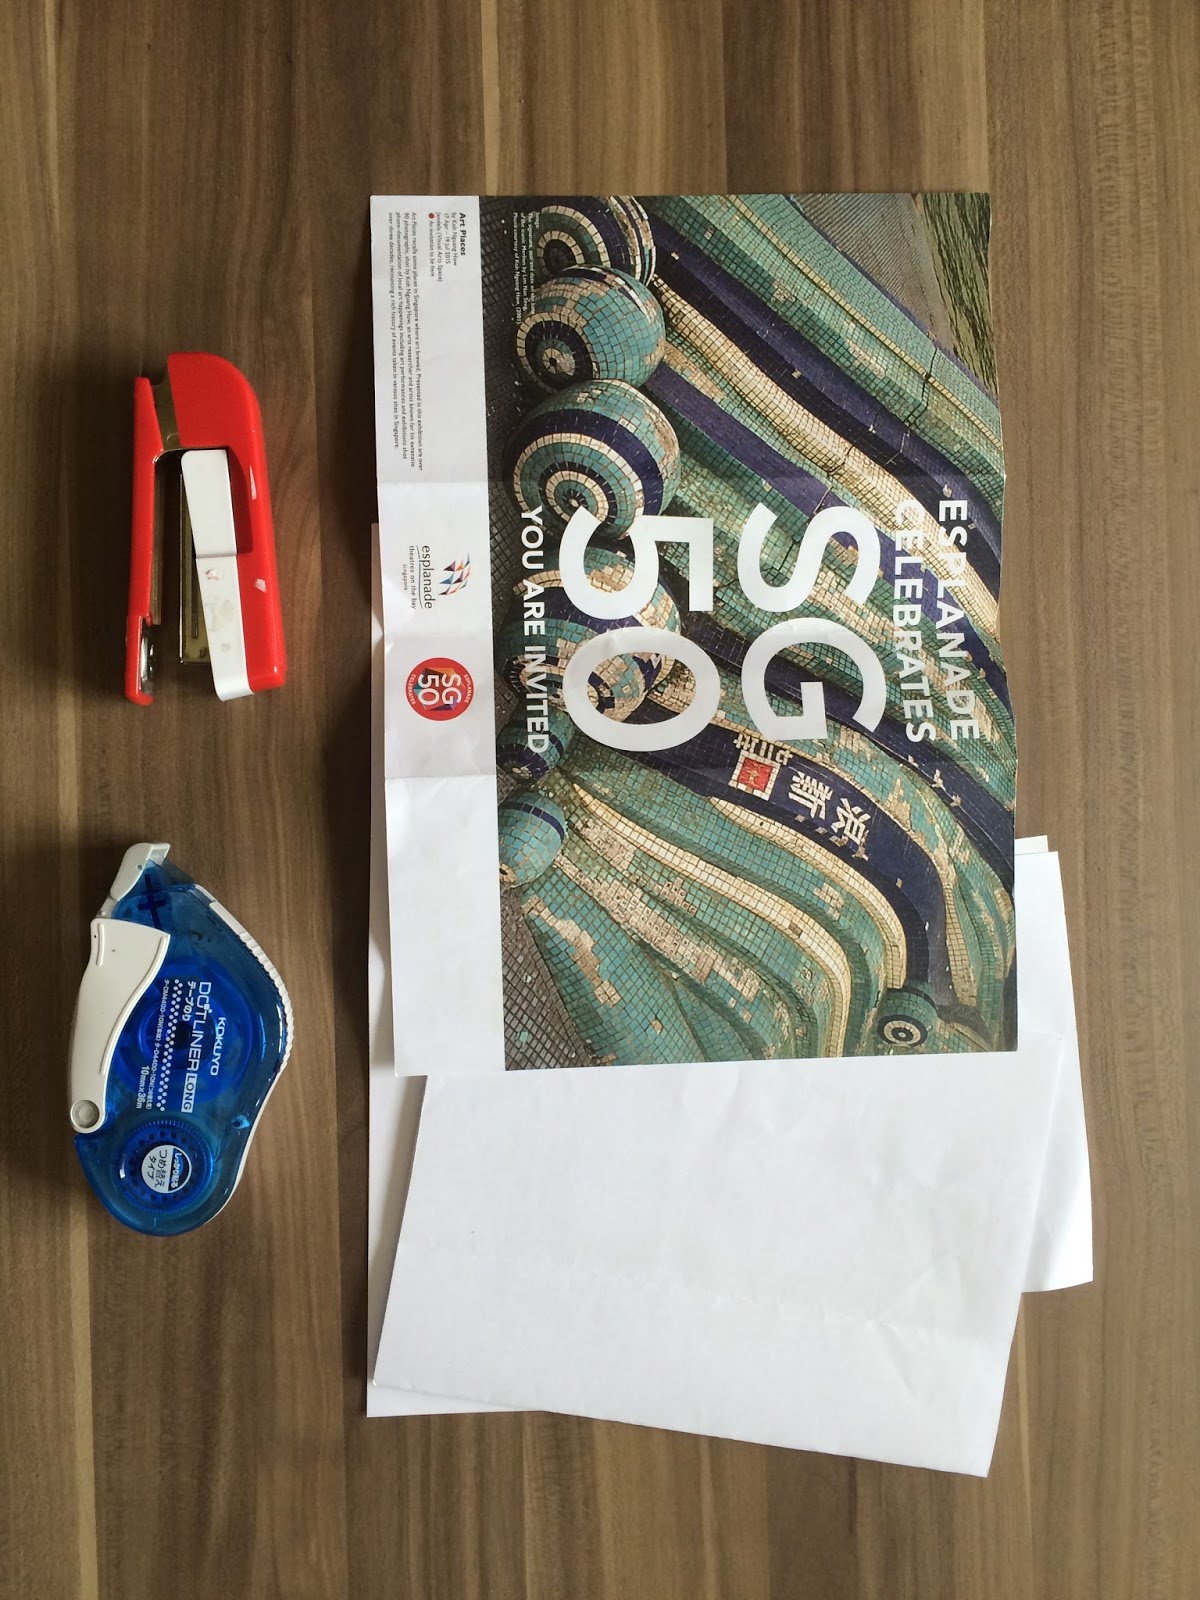
Done! Here is the finished journal when closed and the tools I used!

Like I said, this tutorial is handy for making covers for any kind of journal or notebook, so save it and keep it handy!

Sunday, January 15, 2017

Junk Journals Tutorial 2: Part 1: Free paper is great!

Today's junk journal tutorial makes use of a free notepad I received from some sale or exhibition. ( I totally don't remember anymore, sorry! ) I love to get these because, er, I'm a bit of a paper junkie, but I don't always like the advertising that comes with it. However, it is always easy enough to use the paper to make a journal that you would like and the best thing is, it came free!

This is useful because at times, I come across lovely stiff paper in pamphlets or programme booklets. Although I would just love to make them into journals, I can't, because of all the words on them. So I keep (or hoard) free notepads and notebooks for this reason. 
This is a very easy tutorial to do and even if you have just one free notepad, it provides enough paper to make a number of journals.

The green and white notepad is the one I'm using. It comes from a property website but I don't want to be reminded of that whenever I use it. 

Using Free Paper

You will need:

Tools
Scissors
Bookbinding stapler 
or Stapler and Eraser combo (As written in Tutorial 1a)
Adhesive of your choice (I'm using glue tape which I bought from Daiso)

Materials
One free notebook/notepad
Old brochure (Choose one with hardier paper)
Paper (for cover. I used a page from Frankie magazine with a photo that I liked)

Steps:
1. Tear out your chosen number of brochure pages. Fold the brochure pages into half. This would form something that looks like a small book, on the left.  

2. Tear out a page from the free notepad and stick it on top of each page. You're done! 

Ok, obviously you would be expecting a bit more than that. Now chances are, like me, your free notepad paper will not fit your brochure paper and you will see some words or pictures sticking out the top. To counter this, I explored a few ways to decorate the pages. If you used a brochure with nice pictures, you probably won't have to read the following (but please do, anyway). But if you used one with boring words like me, then here's some decorating ideas:

(Note: Where possible, I have included links to the companies that produce the materials I used. If I didn't, it means I either bought them cheaply or I have totally forgotten where they came from.) 


Most cheapo method: Use marker pens to colour a design at the top. Here I opted for a simple rainbow design. You can also substitute the marker pens for other art mediums of your choice, like watercolours. 


Washi tape: Stick your favourite washi tape over the uncovered parts. Tape bought from MT tape.


Use a stamp of your choice and stamp it repeatedly. Here I used an awesome one from Typo stationery. 


Cut scraps of paper from previous scrapping projects and paste them at the top. This paper was from a Flow Book for Paper Lovers while the one below was from a paper pad from Popular Bookstore. You can also use scraps of pictures from magazines or newspapers or brochures. 


When you are done, staple the pages together using a bookbinding stapler or my alternative stapling method.
When you are done, you will end up with a nice set of stapled pages ready to be journalled in! But nice pages need a nice cover to hold them all together, no? We will cover that in the next tutorial! See you then! 

Saturday, January 14, 2017

#outofthepagesiread - 3 Steps to Mastering Any Subject

It's been a heck of a hiatus after Christmas and New Year, but now that it's officially 2017, time to get working again, especially on the blog! Maintaining the blogging habit has become even more important to me now since we are expecting the little chick to hatch in about a month or two. If I can (hopefully, desperately, crossing my fingers) maintain this blog even during my maternity, I have better hopes of maintaining and even growing it till my chick grows up. Till then, I will just do what little bit I can!

So I'm starting again with #outofthepagesiread and the article I have chosen is apt for anyone who has a new year resolution to learn something new. 

The original article was published on Quartz and I have included a handy link for it right here. What it describes is the Feynman technique, named after physicist Richard Feynman, and on first read, it seems ridiculously easy. 

In a nutshell...

To learn anything, you would need to do three steps:
1. Teach it to a child
2. Review your learning
3. Organize and simplify
(Don't be lazy, read the original article for more details. It's not that hard, trust me)

Does it work? I tried this method last year when I was learning French on my own. Step 1 seems easy but ho boy, try explaining French verbs in a child-like manner @_@ tres difficile! This took some cracking of brain veins because in order to do this, I had to read the very-adult-jargon-like explanation in my book several times before I could rephrase it to myself as if I was a seven-year-old. The hard part about it is that even when I could do so, I wasn't sure I had explained it correctly after the rephrasing. 

This is a powerful step, to be sure, in understanding any subject, but to be really sure of yourself, I think you would need some kind of mentor or study buddy to make sure that you are on the right track. 

It worked more when I was learning photography though, because that was a concept I was more familiar with. For example, when I was trying to make myself remember the concept of apertures, I imagined the light beaming through small circles and big circles. Putting it in the form of a visual aid that I might have drawn on the whiteboard to a class of kids worked better for this. Also, because I understood what an aperture was and I had seen it many times on my camera, it was easy to rephrase this concept. 

So the key to the first step is understanding. A solid understanding of what you are trying to learn will help you in teaching it to someone who doesn't. If you learning something with a lot of technical jargon, you can try reading a simpler version of it to build your understanding first. Also, you might want to consult someone who is already very knowledgeable about it.

Steps 2 and 3 are much easier and puts me more in mind of how we used to cram for our final exams. Methods may vary, though. I found it easier to put everything on a colourful mind map to see the big picture. Others may prefer other forms of organization. Plus, I realized that I learnt better by writing stuff down on paper while other people may prefer Evernote or other note-taking apps. To each his own in this and you will have to explore a bit to find out what works for you. 

So overall...

I find the method easy to remember and doable. It might work for some subjects better than others, but you should still be able to apply it to most things you want to learn. Good luck with your New Year resolutions! 

Source:

I read about this method through Jocelyn K. Glei. She writes about creativity and productivity and she produces a weekly email newsletter with great content. This is a link to her website and you can sign up for the newsletter there too.

Wednesday, January 04, 2017

Starting Afresh... Over the old memories...

Those who have been reading my blog know that from the last entry, I had decided to reuse one of my old journals and I had torn out the pages with bad memories in a kind of purging exercise. 

I didn't manage to do this with all the pages I wanted, though. There were some pages which had better memories on the other side, or other pages that had nice journal entries that I wanted to keep. For the sake of those better ones, I kept those 'dark' pages in the journal.

Yet, I didn't want to keep reminding myself of them every time I turned the pages. So I hit on a plan with an old calendar. 

I had bought this calendar from Workman Publishing in early 2016.


It's a beautiful calendar with an inspiring message for every day of the week and for months, I kept it on my desk, flipping to see the next message. 

Well, obviously the calendar I have is out of date by now, but there were many pieces of artwork inside that I liked very much. So I thought of doing some art journal pages with them over the 'dark' pages in my journal. Why not? Now the pages with the stuff that was better forgotten would be papered over with some better-looking art. 

And so the first page I did in this style is as seen below:

(That's my weekly journal on the right, kindly ignore 😅)

I guess you could call it cheap craft therapy, a way to be creative, forget the bad and replace them with better new messages for the future. It's easy enough to do with the calendar but if you don't, there are tons of inspirational messages being shared freely on Facebook or Pinterest. You can always print one out and paste it down and decorate it with washi tape or the embellishments of your choice. 

And trust me, definitely cheaper than therapy. 

Credits:
Workman Publishing prints other calendars besides this one and they also have a selection of books too. You can check them out at this handy link here.

Sunday, January 01, 2017

Starting Afresh...

First off, Happy New Year 2017, with all its bright hopes! 

I'm proud that I managed to revive this blog as much as I did in 2016. (Every blog post is an hour I didn't spend watching more TV!) 

I know that traditionally, this is the time to be setting NY resolutions, ie, to blog more, to write more, to do more. Usually that is what I would have done as well, but considering that next year is full of flux with the baby coming, I thought I would do something a bit different.


The journal on the left is one that I kept from 2015-early 2016. I'm opening it again for 2017 because I still have some pages left in it that I would like to fill up, maybe with simple reflections about each day. 

The pages on the right are another story. They are a mix of pages that I did in 2015. Some, like the one on top, are project ideas that I had. Some were weekly diary entries for 2015 and I decided to make a fresh start by discarding them.

Other pages in the pile carry heavier meaning. See, 2015 was a pretty bad year for me, work-wise. I had a lot of frustrations and setbacks at work and at times when it all got too bad for me, I journalled them down. So in that pile are also pages with a lot of negativity. 

2016 became a little better because some of the things dragging me down were taken off and also, I became a bit more mindful and organized so I could be a little more chill about work. When I opened the journal and looked at those pages though, the unhappiness in those words became fresh in my mind again. 

As I read through them, I thought, Do I want to carry these around with me? 

I decided not. I ripped out the pages and tossed them. 

In life, there are lessons that we learn that we can carry through life. Those lessons we can carry with us as we live. Bad memories and emotions, however, are a different thing. They drag us down with their negativity and make us relive them over and over again. They keep us in the past instead of carrying us on to the future. 

In this way, I suppose, I'm carrying out the opposite of a resolution. Instead of making plans to step into a bold new future, I'm tossing and burning the past behind so that it doesn't follow me anymore. I'm still not sure enough about the future to make plans or resolutions but I am certain enough about my power over my past, to make sure it doesn't haunt me any longer. And I guess that's as good a start as any. 

So Happy New Year everyone, may you start the year afresh and leave it all behind. 

Friday, December 30, 2016

Reflections on December and 2016

It being the second last day of 2016, it's now or never that I finally get to writing my reflections, I guess. Like any other year, there has been ups and downs and sometimes, things start to look better in retrospect.

Family Life
After a couple of years of trying, I'm finally going to have a baby! I was pretty down in the first half of the year when the first try didn't work out but later on, it did and now I'm expecting to pop in March! I would admit that I have had slightly mixed feelings, loss of personal freedoms vs family life after hearing from so many people about how "it changes your whole life". 

But then I realized a couple of things from some mothers I follow on social media:

1. There are a lot of mothers who have continued doing what they love while having children. I follow a couple of bloggers and Instagrammers who do great writing and art and I used to think they could only do all these because they were childless. I was slightly surprised when I read that some of them had kids, 2 or more in some cases! And they could still update their blog or Instagram account or run their businesses on a regular basis! This taught me that passion helps you find a way. I may have to cut back on some personal goals (no more recitals!) or become a scheduling wizard as long as I can find some small way to do what I love. Which leads me to the next...

2. Be kind to yourself. It's ok if I screw up. It's ok if I don't reach my goals. It's ok if I don't write a new e-book every month, play the violin at Carnegie Hall, become an award-winning artist, become a famous blogger, speak fluently in French, Spanish, Italian and Japanese, raise a successful kid who can do all the above and more, and maintain a full-time job. Even if I make small steps towards just one of my goals, it's ok. No one is judging me except myself and mistakes are acceptable for anyone who is not perfect. (Preferably my mistakes should not involve death or injury though...)

3. For all the complaints I read from new mothers, no one has ever wished they never had their child. And you do hear plenty of complaints, from leaky diapers to full out explosions, screaming tantrums, nights in the hospital. Despite all this, I've not read about a single mother who would give up her child to take back her single life. This gives me hope, that while there will be plenty of crap to clean up, in the end, it's not a rose-coloured vision that everything really does work out in the end. 

So I'm going to follow no.2 when it comes to my kid and take it easy on myself and my future child. He may not become the next President's Scholar but as long as he turns out to be a kind, wise human being, (not a serial killer) that would be all I would ask for.

Blogging Life
Looking back at the posts from January till now, I'm pretty proud that I managed to revive my old blog and I did a lot more writing than I thought I was capable of. This is something new I've learned about myself. Funny thing is that I always thought I had a flair for art more than writing because I was such a visually-oriented person, but in the process of writing, I learned that actually I had more of a flair for writing. Given the right prompts, the ideas flowed more easily on the keyboard than on the drawing pad. 

I'm a bit hesitant to make plans for 2017 because of the kid coming but if there's one thing, I would like to continue blogging as much as I can. The focus may change and I may write a lot more about life with a baby, but I would still want to keep this blog alive to remind me of the writing I completed in 2016 and to spur me on to other creative projects in the future. 

Creative Life
I'm also pretty proud that I dabbled a lot more creatively this year. I did a lot more journalling and in December, I even managed to organize some material into my own e-book. I also managed to do some watercolour painting and make some journals. I also take pride in performing on stage in my first violin recital! Although I played terribly off-key, (-_-!) I take pride in actually mustering the guts to go up and do it, something I'm not sure many 5-month pregnant ladies can claim to do! In some months, I also managed to up my French by learning some grammar. I probably can't order a cup of water in France, but it's still a bit of progress from knowing nothing to knowing something.

When you read the paragraph above, it all seems pretty random but I've come to accept that that's the kind of person I am. I like a certain degree of novelty and variety so I tried several different things each month. What worked for me was listing down all the activities I wanted to try and then making some goals each month, plus making myself accountable by blogging as much as I could about the steps I made. Being a Jack of all trades seems to work better for me than being a Master of one. 

(These techniques I learned from 7 habits of Highly Effective People by Stephen Covey and Better than Before by Gretchen Rubin.)

I also read, read and read. I had a personal goal at the start of the year to read at least one non-fiction book each month, which according to my Goodreads account, I've achieved, so yay! I didn't hit the upgraded goal I set for myself, which was 48 books, but on average, I've completed 3 books each month. I think with the baby, this could be the easier goal for me to reach next year......

With all I've done this year, I think in 2017, I would take a creative break and concentrate on how to take care of my kid. I might still do some light reading and a little bit of doodling here and there but I also think it's prudent that I don't set major goals for myself until I've settled the domestic arrangements with my in-laws and my kid. I also suspect that I may have to resume my fitness goals next year to lose all the postnatal weight! So in 2017, the focus here might be to take it easy and do it for fun till family life becomes more stable. 

In a nutshell...
I guess 2016 wasn't too bad and in retrospect, some of the things that seemed really bad at the time now look very far away. I suppose with distance and reflection, life on the whole really has a lot that we can be grateful for if we choose to see it that way. If there's anything to hope for in 2017, I can only hope that by December 2017, I can look back and see all the good stuff and be filled with the same hope for 2018! Happy new year, everyone and here's to a great 2017! 

Junk Journals Tutorial 1a: An alternative to bookbinding staplers

It's been a great break during Christmas, hope everyone had a good time because I'm back with an extension of the previous tutorial!

I realized that for many people, the bookbinding stapler may be difficult to find. Today's tutorial may then be helpful, because I'm going to show you how to achieve the same effect with ordinary stationery you can find anywhere. 

Before I found the stapler, I was experimenting with other methods, eg, using tape, but they didn't produce the nice clean result I wanted. Then one day, I was stapling posters to a notice board and it hit me: I could use this to staple pages together as well!

Tutorial 1a: Rough and Dirty Journal - Alternative Stapling Method

You will need:
- A stapler (Find one which can open, eg the type you would use to staple posters to a wall)
- An eraser
- Paper clips or binder clips (Optional, but I find it much easier to do it with clips)

And here I've also used the following for this tutorial:
- Scissors
- Paper
- Cardboard (for the cover)


Step 1: Get the pages of the journal ready. (Here, I've had to cut the pages to size) Then position the pages on top of the cardboard and fold the edges of the cardboard down to size.

Tip: Leave some cardboard around the edges so that your pages will fit nicely inside the journal and will not stick out.

Tip: Use the handle of your scissors to press the cardboard down and create a neat fold.

Step 2: Prepare the pages and cover for stapling. Open the blank pages to the centre and clip the left and right side pages to the cover with the paper clips. Open the stapler as shown.

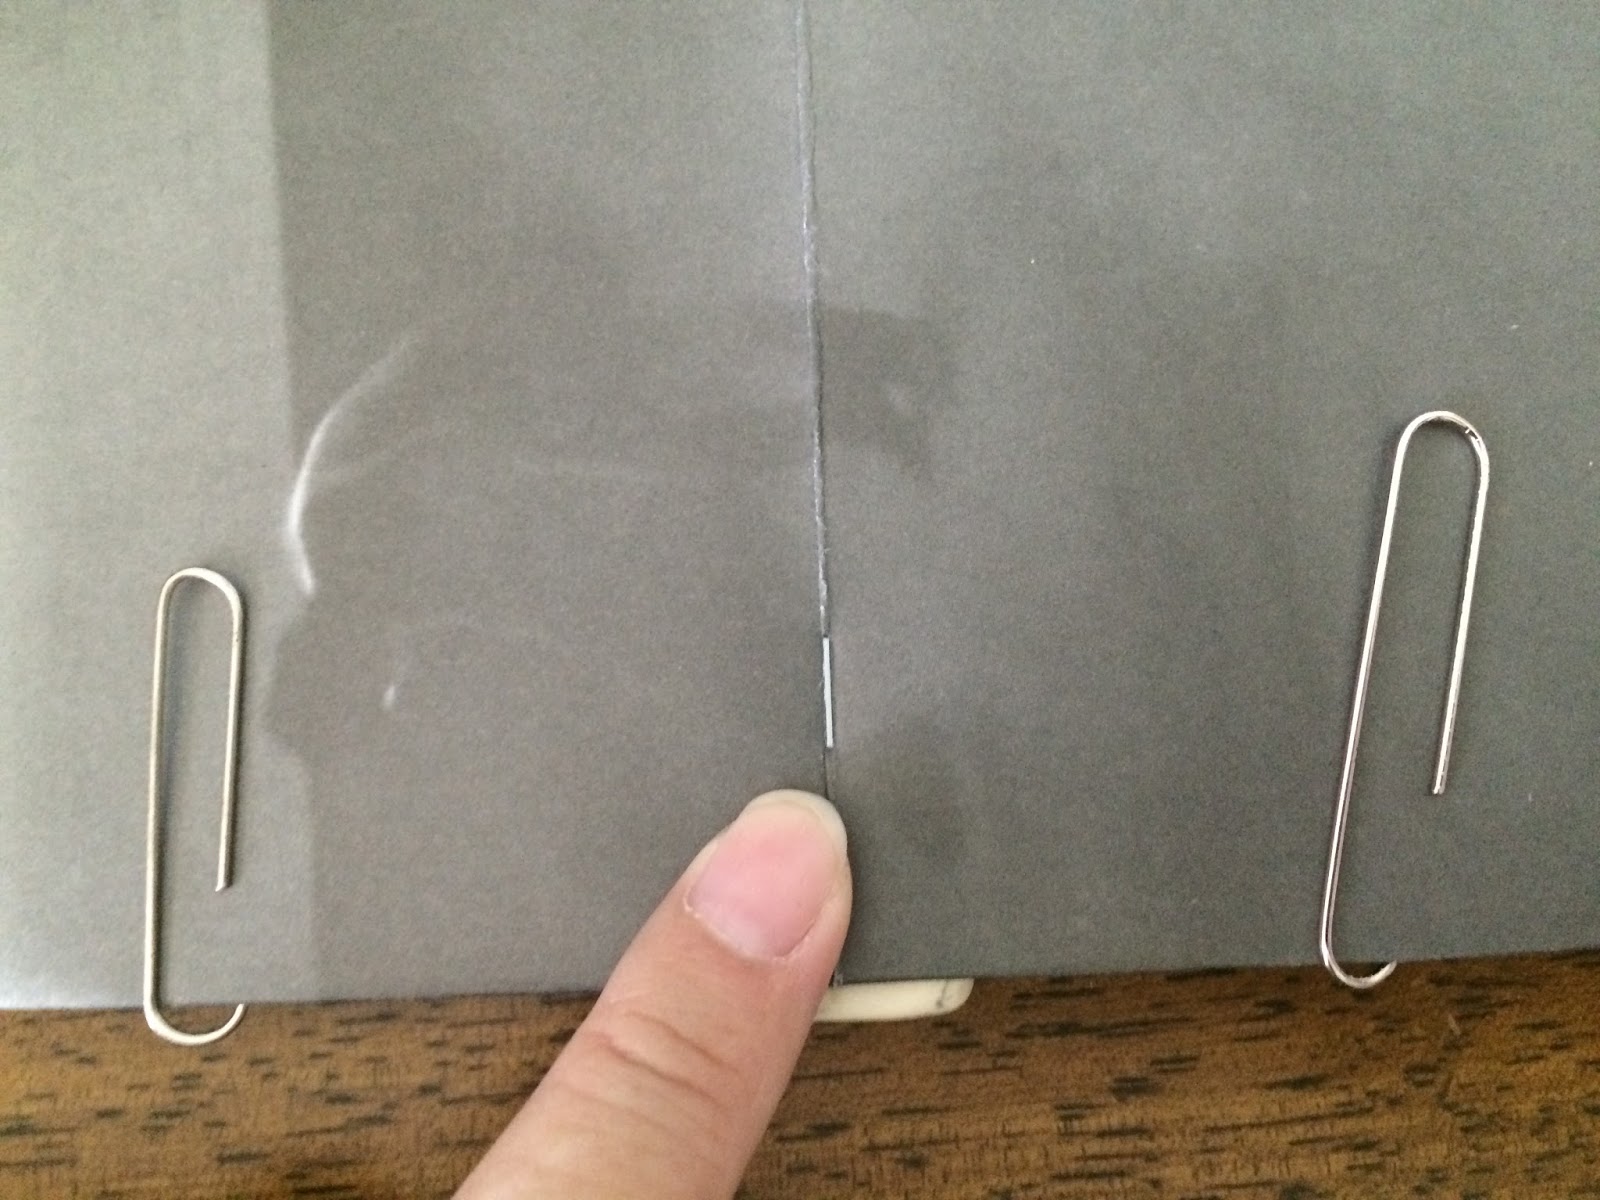
Place the eraser directly under the centre fold of the journal. If you can't notice it well in the picture, I'm pointing to the part of the centre fold where the eraser is. 

Place the top part of the stapler so that the pages will be stapled exactly (or as best as you can) on the centre fold. Press the stapler.

If you got it right, the result should look like this from the top. Your pages will now be stapled to the eraser.

Step 3: Do the finishing touches. Flip the journal over and remove the eraser. You should see the staples sticking out. Don't prick yourself!

Use the stapler to press down the staples.

Once you are done, your pages will look like this! (Oops, I didn't quite fold the pages correctly...)

Now repeat on the other side and your journal is done!

Here's what it looks like from the outside:

So there you are! A simple hack that anyone can do with some ordinary stationery and your journals will look like professional zines! Try it today!

Thursday, December 22, 2016

Junk Journals Tutorial 1 (easy) : The Rough and Dirty Journal

In my past 2 chapters, I covered the why of making Junk Journals and what materials and tools you'd need to get started. Now let's start with an easy tutorial. 

This journal is one of the easiest to get started with, especially if you have the bookbinding stapler I mentioned in Tools and Materials. (If you don't, you can substitute it with other tools. I'll explain later in the post) It will also give you a peek into simple bookbinding. I call it the Rough and Dirty Journal because here we are not so concerned about making it look nice and polished yet so it's going to look a little rough around the edges. However, it's one of the easiest to do if you want to just get started.

Tutorial 1: The Rough and Dirty Journal

You will need:

Tools:
Bookbinding stapler 
(If not, needle and thread or tape)
Adhesive ( I like to use the adhesive tape shown in blue but you can use a glue of your choice )

Materials:
Junk paper (Ensure you have an even number of pages)
1 brochure (For the cover)


Step 1:
Arrange the junk paper together so that the written sides face each other.


Step 2: Use your adhesive to stick both sides together. You should end up with a slightly thicker sheet of paper that is blank on both sides.

Step 3: Arrange your pages together with the brochure on top. Here I have chosen an old programme sheet. Get your stapler ready.

Step 4: Fold everything in half to get a centre fold. Here, you can roughly see what your journal will look like.

Step 5: This is where the beauty of the bookbinding stapler comes in. Open the pages again and flip out the stapler. Then align it where the centre fold is before stapling.

This is a close up of the centrefold. You can see that after that is done, the pages have been stapled very nicely, like a magazine.

Repeat with one more staple on the other side and you are done! Very easy, isn't it?

This journal is still blank, but if you want to see what one looks like after I wrote in it, you can see this previous post on a Rough and Dirty journal that I already did and filled with writing.

Questions! Questions! 
So I know there will be some questions and comments on your mind, let me try to answer as many of them here.

- If you don't have the stapler I used, you can also use a needle and thread and do a basic stitch along the spine to achieve the same look. Also, you can use tape to tape the pages together. 

- If you want a more finished and polished look, you can also trim the edges of the white paper so that they don't stick out of the cover. (But hey, it is a rough and dirty journal after all...)

- For a hardier cover, use a brochure that is made of thicker cardboard or thicker paper. Alternatively, stick the brochure onto another piece of junk paper. 

More questions? Comments?
Leave them in the comment sections below and I'll get back to you as soon as I can! (Be nice, be constructive and I will do the same for you)

Did you try it out? 
I would love to see what you did with your own journals too. If you would like to share, email photos of your journal to me. Remember to include your name, country (optional) and email address so that I can credit your work here!  

Tuesday, December 20, 2016

Junk Journals, Materials and Tools - What would you need to get started?

In the last chapter, I talked about Junk Journals and why I started making them. In this one, I'm going to talk about the materials and the tools I use, and what you would need to get started.

Materials
Of course, you would need paper. Paper can be salvaged from a number of sources, those which I've tried are listed below:

Magazines. Some magazines come printed on good quality paper. After reading it, you can tear out the pages you like. For magazines which are printed on glossy paper, you may have to do some pasting with other writing paper or you may have to paint it with gesso. I'll talk about these later.

Brochures and flyers. Every week, 5 of these get put into my mailbox. I don't think the company intended for me to use them in journals. However, the glossy paper that some of them are printed on means that you may have to do some pasting or painting so that you can use them.

Statements from banks, credit cards, insurance. Word of CAUTION first: Make sure the statements are outdated before you do anything with them! These are also typically printed on good quality paper but you do want to make sure you pay off your credit card bills before you paint over them and forget about them! Also, in the case of bank and insurance statements, make sure all financial affairs are in order before putting them in the junk pile. I would usually have my husband help me to check if the statement needs to be filed before I do anything with it.

Work. Like I mentioned in the introduction, we use tons of paper at work. This is my favourite source of paper because all our work documents get printed on good quality printing paper. If only one side of the paper was used, that means the other side will be gloriously blank. Another word of CAUTION: Make sure you absolutely do NOT need the document anymore before doing anything with it! My practice is to collect the paper in a pile and only use it at the end of the year. 

Free notebooks, notepads and diaries. These may be given out by the banks or sometimes as gifts. I love them because it's easy to change their appearance by wrapping them in a design I like. By now, my friends know of my hoarding instinct so they save any free writing material they get for me. Score one for friendship!

Other advice: Collect paper in a variety of thickness. Soft paper can be used for painting and writing, stiffer and thicker paper can be used to make journal covers. Stiff cardboard can also be cut into strips to bind paper together. (More on that later)

Wow, that's a ton of paper up to use! If you already have all these lying around, what else would you need to transform them into books?

Tools

Basic tools would be:

  1. Scissors for cutting
  2. Glue to stick pages together and pictures on pages


For a more finished look, you can also use:

  1. Needle and thread for basic bookbinding
  2. A bookbinding stapler
  3. Duct tape or bookbinding tape

Now No.2 may sound a little strange but it's a great tool to have to give your journals that really professional zine look, so it's my great pride and joy! They are usually expensive and can't be found in your normal stationery store, so when I found out that Daiso (a $2 shop in Singapore) was actually selling them, I bought one right away! 

This is what my bookbinding stapler looks like: 

 The unique part about it is the white part. It holds the staples and it flips out, as shown below:
 All the way to a right angle.
 This allows you to staple paper right in the middle, and your journal will open very nicely.

This stapler is my pride and joy, considering it only cost $2 but it made my journal-making so much better! I'm tempted to buy it every time I go to Daiso just in case this red one breaks one day!

Then there are other stuff also, that make your journal a whole lot prettier. There are places where you can buy great paper or washi tape to give your journal that extra decorative touch. However, before you go there, you have to read the following:

Crafter's Anonymous - Hi, My Name is...
Personal confession: I don't only use junk paper but I also have a crazy load of craft paper, notepaper and notebooks, some of which I have had for a few years. -_-!!! When I first started scrapbooking, I went a bit crazy and bought almost every paper I thought cute. Then I hoarded them because I became afraid to use them. What if my project turned out ugly?? 

After a couple of years of this, I had the following epiphany:
What it reminds me is that I am here to DO things, not buy them. The paper I buy is meant to help me accomplish and achieve journal-making goals and I would never get anywhere near those goals if all I'm doing is accumulating paper. (Unless your goal is to set up a paper museum) Once that clicked in my head, I decided to throw caution to the wind and just use what I had.

It makes me proud to say that I haven't bought any new paper since but I've been slowly chipping away at my hoarded pile. If you feel like buying some nice paper just to spruce things up in your journal, I wouldn't stop you, but if you are going to spend the money, make sure you really like the paper and make sure you do use what you have. 

But if you really want to spend money on nice stuff...
Now you're done with the warning, here are some of the places I've been to:
(Note: These stores are all in Singapore but some also have websites for you to purchase online)

For paper and scrapbooking materials:
Kikki.k sells all kinds of wonderful stationery and sometimes it takes all my willpower to walk out of here without buying anything. 
Paperstone.sg and Typo Stationery have a great range of notebooks and to-do lists and notepads.
The Paper Market is a dream for me and a nightmare for my bank account. Everything to do with scrapbooking can be found here, like paper, washi tape and stickers.
Daiso sells a good range of craft materials, every one of which can be bought for $2, so if you are on a budget, this is the place to go. (Unfortunately, a Google search only brings up this online store which only allows you to buy in bulk. Singaporeans can find the outlet nearest to them via a quick Google search)

For inspiration and paper:
I also buy some of these magazines for inspiration and er, paper.
Flow Magazine is one for the paper-lovers and those who want life to go a bit more slowly. They sometimes include free gifts for paper-lovers (like journals) and they also release a Book for Paper Lovers every year, which is a thick tome full of beautiful paper.
Frankie Magazine is an Australian magazine full of quirky creative inspiration. They take interesting photos which I sometimes cut out to scrap and they are also printed on good quality paper.
Daphne's Diary is beautifully designed and also comes with paper goodies to cut out. 
Cloth Paper Scissors focuses on art techniques and mixed media and they also have a section on their website on art journalling and handmade books. It's a great source of inspiration.
In Singapore, all these magazines can be found at Kinokuniya or Basheer at Bras Basah Centre. I do recommend calling the stores before going down because they don't get released every month and I have made a few wasted trips before. -_-!!! 

Ok, now you know what you need to get started! Next time, I'll talk about a few easy techniques to start off with!