No English? No Problem!

Showing posts with label flowmagazine. Show all posts

Sunday, January 15, 2017

Junk Journals Tutorial 2: Part 1: Free paper is great!

Today's junk journal tutorial makes use of a free notepad I received from some sale or exhibition. ( I totally don't remember anymore, sorry! ) I love to get these because, er, I'm a bit of a paper junkie, but I don't always like the advertising that comes with it. However, it is always easy enough to use the paper to make a journal that you would like and the best thing is, it came free!

This is useful because at times, I come across lovely stiff paper in pamphlets or programme booklets. Although I would just love to make them into journals, I can't, because of all the words on them. So I keep (or hoard) free notepads and notebooks for this reason. 
This is a very easy tutorial to do and even if you have just one free notepad, it provides enough paper to make a number of journals.

The green and white notepad is the one I'm using. It comes from a property website but I don't want to be reminded of that whenever I use it. 

Using Free Paper

You will need:

Tools
Scissors
Bookbinding stapler 
or Stapler and Eraser combo (As written in Tutorial 1a)
Adhesive of your choice (I'm using glue tape which I bought from Daiso)

Materials
One free notebook/notepad
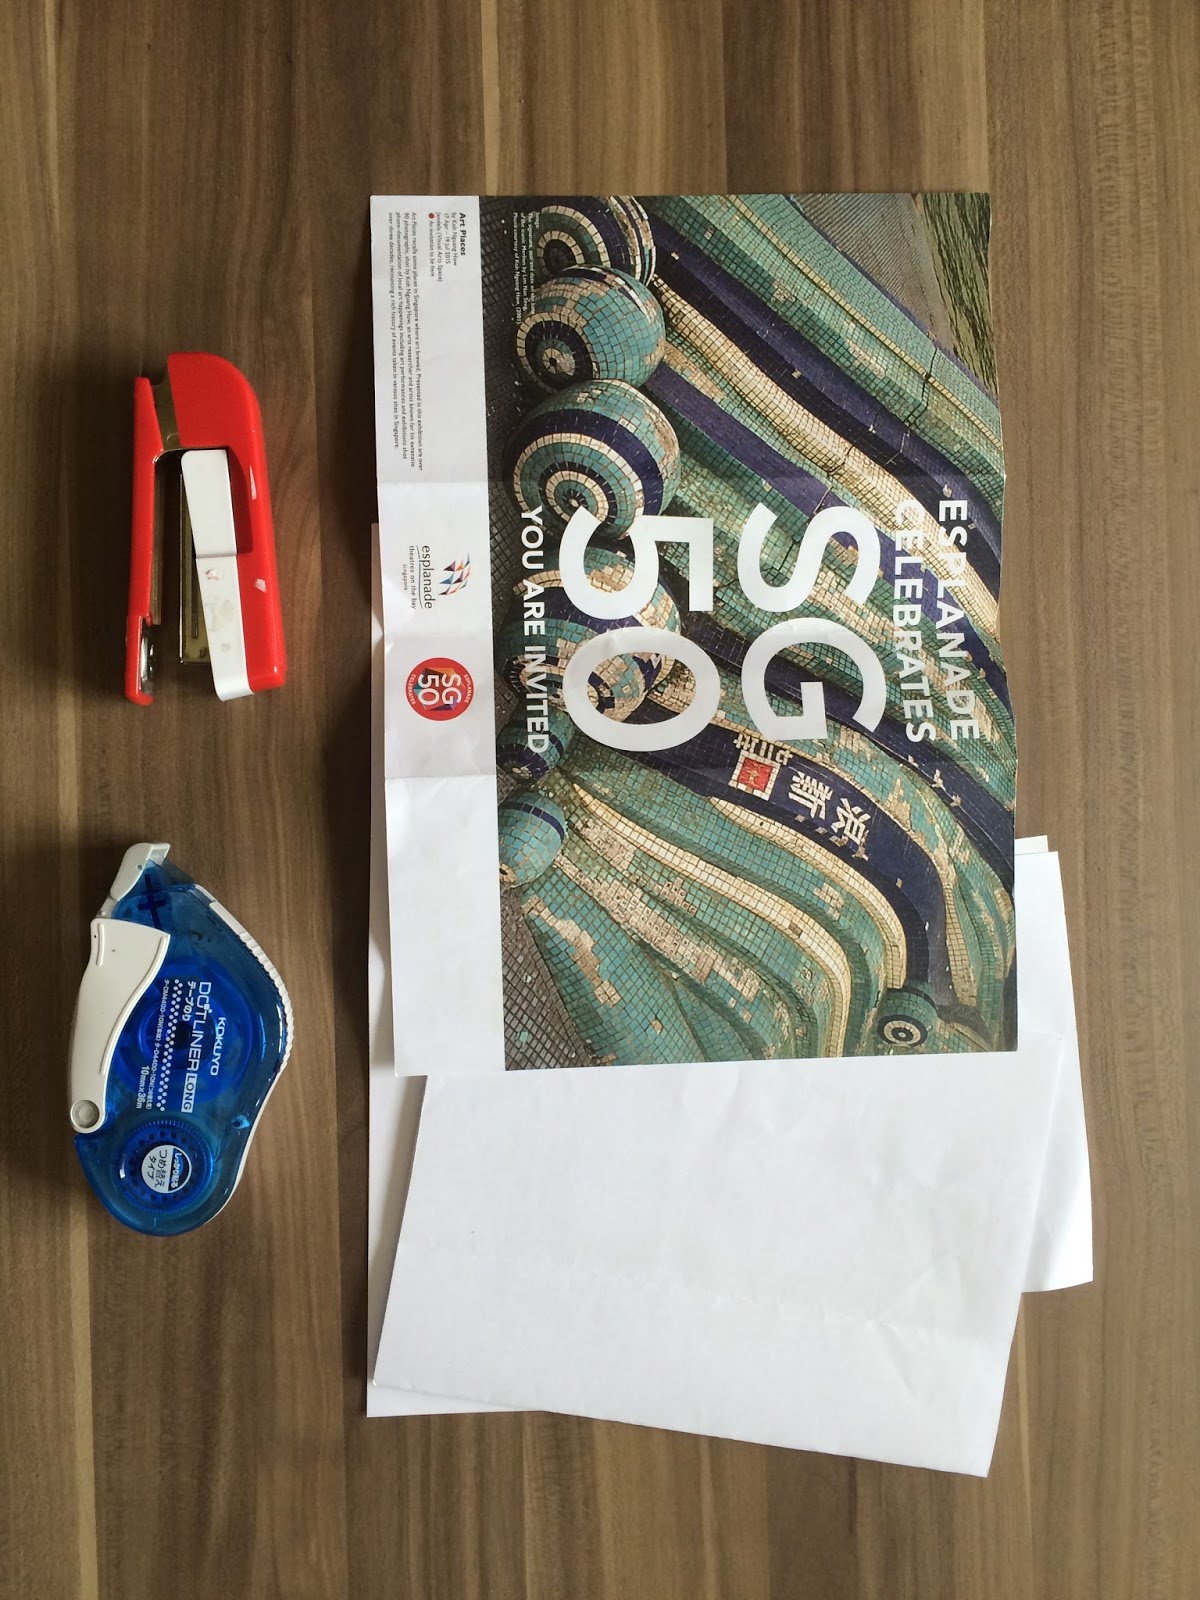
Old brochure (Choose one with hardier paper)
Paper (for cover. I used a page from Frankie magazine with a photo that I liked)

Steps:
1. Tear out your chosen number of brochure pages. Fold the brochure pages into half. This would form something that looks like a small book, on the left.  

2. Tear out a page from the free notepad and stick it on top of each page. You're done! 

Ok, obviously you would be expecting a bit more than that. Now chances are, like me, your free notepad paper will not fit your brochure paper and you will see some words or pictures sticking out the top. To counter this, I explored a few ways to decorate the pages. If you used a brochure with nice pictures, you probably won't have to read the following (but please do, anyway). But if you used one with boring words like me, then here's some decorating ideas:

(Note: Where possible, I have included links to the companies that produce the materials I used. If I didn't, it means I either bought them cheaply or I have totally forgotten where they came from.) 


Most cheapo method: Use marker pens to colour a design at the top. Here I opted for a simple rainbow design. You can also substitute the marker pens for other art mediums of your choice, like watercolours. 


Washi tape: Stick your favourite washi tape over the uncovered parts. Tape bought from MT tape.


Use a stamp of your choice and stamp it repeatedly. Here I used an awesome one from Typo stationery


Cut scraps of paper from previous scrapping projects and paste them at the top. This paper was from a Flow Book for Paper Lovers while the one below was from a paper pad from Popular Bookstore. You can also use scraps of pictures from magazines or newspapers or brochures. 


When you are done, staple the pages together using a bookbinding stapler or my alternative stapling method.
When you are done, you will end up with a nice set of stapled pages ready to be journalled in! But nice pages need a nice cover to hold them all together, no? We will cover that in the next tutorial! See you then! 

Thursday, December 22, 2016

Junk Journals Tutorial 1 (easy) : The Rough and Dirty Journal

In my past 2 chapters, I covered the why of making Junk Journals and what materials and tools you'd need to get started. Now let's start with an easy tutorial. 

This journal is one of the easiest to get started with, especially if you have the bookbinding stapler I mentioned in Tools and Materials. (If you don't, you can substitute it with other tools. I'll explain later in the post) It will also give you a peek into simple bookbinding. I call it the Rough and Dirty Journal because here we are not so concerned about making it look nice and polished yet so it's going to look a little rough around the edges. However, it's one of the easiest to do if you want to just get started.

Tutorial 1: The Rough and Dirty Journal

You will need:

Tools:
Bookbinding stapler 
(If not, needle and thread or tape)
Adhesive ( I like to use the adhesive tape shown in blue but you can use a glue of your choice )

Materials:
Junk paper (Ensure you have an even number of pages)
1 brochure (For the cover)


Step 1:
Arrange the junk paper together so that the written sides face each other.


Step 2: Use your adhesive to stick both sides together. You should end up with a slightly thicker sheet of paper that is blank on both sides.

Step 3: Arrange your pages together with the brochure on top. Here I have chosen an old programme sheet. Get your stapler ready.

Step 4: Fold everything in half to get a centre fold. Here, you can roughly see what your journal will look like.

Step 5: This is where the beauty of the bookbinding stapler comes in. Open the pages again and flip out the stapler. Then align it where the centre fold is before stapling.

This is a close up of the centrefold. You can see that after that is done, the pages have been stapled very nicely, like a magazine.

Repeat with one more staple on the other side and you are done! Very easy, isn't it?

This journal is still blank, but if you want to see what one looks like after I wrote in it, you can see this previous post on a Rough and Dirty journal that I already did and filled with writing.

Questions! Questions! 
So I know there will be some questions and comments on your mind, let me try to answer as many of them here.

- If you don't have the stapler I used, you can also use a needle and thread and do a basic stitch along the spine to achieve the same look. Also, you can use tape to tape the pages together. 

- If you want a more finished and polished look, you can also trim the edges of the white paper so that they don't stick out of the cover. (But hey, it is a rough and dirty journal after all...)

- For a hardier cover, use a brochure that is made of thicker cardboard or thicker paper. Alternatively, stick the brochure onto another piece of junk paper. 

More questions? Comments?
Leave them in the comment sections below and I'll get back to you as soon as I can! (Be nice, be constructive and I will do the same for you)

Did you try it out? 
I would love to see what you did with your own journals too. If you would like to share, email photos of your journal to me. Remember to include your name, country (optional) and email address so that I can credit your work here!  

Tuesday, December 20, 2016

Junk Journals, Materials and Tools - What would you need to get started?

In the last chapter, I talked about Junk Journals and why I started making them. In this one, I'm going to talk about the materials and the tools I use, and what you would need to get started.

Materials
Of course, you would need paper. Paper can be salvaged from a number of sources, those which I've tried are listed below:

Magazines. Some magazines come printed on good quality paper. After reading it, you can tear out the pages you like. For magazines which are printed on glossy paper, you may have to do some pasting with other writing paper or you may have to paint it with gesso. I'll talk about these later.

Brochures and flyers. Every week, 5 of these get put into my mailbox. I don't think the company intended for me to use them in journals. However, the glossy paper that some of them are printed on means that you may have to do some pasting or painting so that you can use them.

Statements from banks, credit cards, insurance. Word of CAUTION first: Make sure the statements are outdated before you do anything with them! These are also typically printed on good quality paper but you do want to make sure you pay off your credit card bills before you paint over them and forget about them! Also, in the case of bank and insurance statements, make sure all financial affairs are in order before putting them in the junk pile. I would usually have my husband help me to check if the statement needs to be filed before I do anything with it.

Work. Like I mentioned in the introduction, we use tons of paper at work. This is my favourite source of paper because all our work documents get printed on good quality printing paper. If only one side of the paper was used, that means the other side will be gloriously blank. Another word of CAUTION: Make sure you absolutely do NOT need the document anymore before doing anything with it! My practice is to collect the paper in a pile and only use it at the end of the year. 

Free notebooks, notepads and diaries. These may be given out by the banks or sometimes as gifts. I love them because it's easy to change their appearance by wrapping them in a design I like. By now, my friends know of my hoarding instinct so they save any free writing material they get for me. Score one for friendship!

Other advice: Collect paper in a variety of thickness. Soft paper can be used for painting and writing, stiffer and thicker paper can be used to make journal covers. Stiff cardboard can also be cut into strips to bind paper together. (More on that later)

Wow, that's a ton of paper up to use! If you already have all these lying around, what else would you need to transform them into books?

Tools

Basic tools would be:

  1. Scissors for cutting
  2. Glue to stick pages together and pictures on pages


For a more finished look, you can also use:

  1. Needle and thread for basic bookbinding
  2. A bookbinding stapler
  3. Duct tape or bookbinding tape

Now No.2 may sound a little strange but it's a great tool to have to give your journals that really professional zine look, so it's my great pride and joy! They are usually expensive and can't be found in your normal stationery store, so when I found out that Daiso (a $2 shop in Singapore) was actually selling them, I bought one right away! 

This is what my bookbinding stapler looks like: 

 The unique part about it is the white part. It holds the staples and it flips out, as shown below:
 All the way to a right angle.
 This allows you to staple paper right in the middle, and your journal will open very nicely.

This stapler is my pride and joy, considering it only cost $2 but it made my journal-making so much better! I'm tempted to buy it every time I go to Daiso just in case this red one breaks one day!

Then there are other stuff also, that make your journal a whole lot prettier. There are places where you can buy great paper or washi tape to give your journal that extra decorative touch. However, before you go there, you have to read the following:

Crafter's Anonymous - Hi, My Name is...
Personal confession: I don't only use junk paper but I also have a crazy load of craft paper, notepaper and notebooks, some of which I have had for a few years. -_-!!! When I first started scrapbooking, I went a bit crazy and bought almost every paper I thought cute. Then I hoarded them because I became afraid to use them. What if my project turned out ugly?? 

After a couple of years of this, I had the following epiphany:
What it reminds me is that I am here to DO things, not buy them. The paper I buy is meant to help me accomplish and achieve journal-making goals and I would never get anywhere near those goals if all I'm doing is accumulating paper. (Unless your goal is to set up a paper museum) Once that clicked in my head, I decided to throw caution to the wind and just use what I had.

It makes me proud to say that I haven't bought any new paper since but I've been slowly chipping away at my hoarded pile. If you feel like buying some nice paper just to spruce things up in your journal, I wouldn't stop you, but if you are going to spend the money, make sure you really like the paper and make sure you do use what you have. 

But if you really want to spend money on nice stuff...
Now you're done with the warning, here are some of the places I've been to:
(Note: These stores are all in Singapore but some also have websites for you to purchase online)

For paper and scrapbooking materials:
Kikki.k sells all kinds of wonderful stationery and sometimes it takes all my willpower to walk out of here without buying anything. 
Paperstone.sg and Typo Stationery have a great range of notebooks and to-do lists and notepads.
The Paper Market is a dream for me and a nightmare for my bank account. Everything to do with scrapbooking can be found here, like paper, washi tape and stickers.
Daiso sells a good range of craft materials, every one of which can be bought for $2, so if you are on a budget, this is the place to go. (Unfortunately, a Google search only brings up this online store which only allows you to buy in bulk. Singaporeans can find the outlet nearest to them via a quick Google search)

For inspiration and paper:
I also buy some of these magazines for inspiration and er, paper.
Flow Magazine is one for the paper-lovers and those who want life to go a bit more slowly. They sometimes include free gifts for paper-lovers (like journals) and they also release a Book for Paper Lovers every year, which is a thick tome full of beautiful paper.
Frankie Magazine is an Australian magazine full of quirky creative inspiration. They take interesting photos which I sometimes cut out to scrap and they are also printed on good quality paper.
Daphne's Diary is beautifully designed and also comes with paper goodies to cut out. 
Cloth Paper Scissors focuses on art techniques and mixed media and they also have a section on their website on art journalling and handmade books. It's a great source of inspiration.
In Singapore, all these magazines can be found at Kinokuniya or Basheer at Bras Basah Centre. I do recommend calling the stores before going down because they don't get released every month and I have made a few wasted trips before. -_-!!! 

Ok, now you know what you need to get started! Next time, I'll talk about a few easy techniques to start off with!

Wednesday, November 30, 2016

Junk Journals

I've been making recycled paper journals, since it's that time of year where we have to move cubicles at work, and inevitably, there are tons of paper we have to throw or recycle. I sometimes feel a bit of a heartache when I have to do this, because I'm a paper junkie and I always felt like there was more I could do with the paper. Also, there were worksheets were I didn't use both sides of the paper and the blank side always held so much... potential. Yes, paper junkie >-<!!! 

Then I had the idea to try making recycled paper journals, or junk journals. Not that I put nothing but junk inside, but to use the paper which would have been junked, to make journals. At least if I managed to get one more use of the paper, I would feel *slightly* better about the environment and also maybe I won't have to buy any more notebooks for the rest of my life! Lastly, I would also be able to exercise some creativity in decorating the notebooks and *finally* depleting my stash of craft paper materials. 

Making the junk journal was easy. I planned a daily journal for November as a trial, then I chose some junk paper and stapled them together. After that, I decorated the pages with the layouts I wanted and finally, I filled in my daily entries.

Here's the result for November: 
(Note: Where possible, I have tried to include the sources for my materials, but unfortunately, I can't remember all of them, so if anyone recognizes them, let me know and I will put the sources in!)

Cover: Flow Book for Paper Lovers

Credits: Kikki.K 3AM notepad and Paperstone.sg to-do list

Credits: Ameba stuff My really busy week memo mousepad

Credits: 3M washi tape, Flow Book for Paper Lovers paper. Calligraphy stickers I bought from a flea stall but unfortunately, lost the lady's contacts -_-!!!

Credits: Paper on left from Daiso, on right from Kikki.k. 

Overall, I am pleased with how the results turned out, but I am also aware that it's not really recycling in the truest sense. I only managed to make such nice layouts because I had the nice paper in my house all along. The next step in this challenge for me, thus, is to make one without nice paper and to start from scratch. 

Still, if you are a paper junkie like me, and you also have a sizable stash of craft paper, this is something easy you can do to use your stash for a worthy cause. If you just have to have nice paper, Daiso sells a good range and for SGD$2, you can buy enough paper for a month. For a year's worth of journal entries, that will cost you around $24, which is cheaper than a Moleskine but you might still get cute diaries cheaper than that, so weigh the costs and decide if it's worth it for you. 

Wednesday, November 02, 2016

Experiences, not Acquisitions

Hi, I'm Aki Tan and I'm a hoarder.

I hoard books, not bears, by the way...

The above picture is a small fraction of the burgeoning collection of books and magazines that is threatening to bring down my bookshelf. I have a box of craft materials that is not very used. I have rolls and rolls of washi tape and files of scrapbooking paper. 

Why do I have so much stuff? Well, partly it's GAS = Gear Acquisition Syndrome. The term is more commonly used for tech gear but in this case, I think the same applies to the books, magazines and craft materials that I have.

Which is why I read (and re-read) the articles in Flow Issue 5 with interest. There were 2 articles which I felt spoke directly to hoarders keen for rehab. In one of the articles, "How Great Small Can Be", Alain de Botton wrote:

"Why, then, if expensive things cannot bring us remarkable joy, are we so powerfully drawn to them?... Because expensive items can feel like plausible solutions to needs we don't understand."

So it becomes easier to buy something than to do serious soul-searching to find out what is it we're missing. After all, it only takes a walk to the store and an opening of the wallet. And research has also proven before that impulse buys can indeed bring a high level of satisfaction. (A Google brings up a list of research, I have chosen to link this one: Effects of Impulse Purchases on Consumers' Affective States.) 

This is true for me, for the craft materials at least. When I moved into my new house, I had a whole room which I used as a study/studio. With all that space to play with, I suddenly found myself able to buy and store all the paper I ever wanted, and paper being paper, of course took up space. I couldn't bear to use all the stuff I bought, though, 'cause what if I wanted to use it for another project? What if I used it and it didn't turn out right?

I acquired and acquired and one day, I realized, they become 'plausible solutions to needs' that I didn't understand fully yet. I wanted to Make Good Art, and so I bought all those things thinking that I would some day. But my real need wasn't to buy materials, it was to actually do stuff with them.

It took a lot of acquiring before I realized that the only thing I was doing was collecting materials but yet I had nothing to show for all the buying I was doing. At some point, I told myself, that's it, now it's time to start making

And when I started making, this led to another kind of satisfaction, which was the kind that authors Botsman and Rogers (What's Mine is Yours: The Rise of Collaborative Consumption) referred to. 

"We want to fulfil our needs with the material or experience that these products offer." Yes, the experience from the products, not the products itself. 

This is a good reminder every time I am tempted by something new. I ask myself: Am I more interested in buying the book? Or reading it? Do I want to make art, or buy paint? The reminder here is that what we are really interested in is the experience that comes from the product. If the experience can be had with something already in possession, then further purchase is unnecessary. Even if acquisition is necessary, sites like Carousell can help one to buy something secondhand and usable instead of buying a new items.

Nowadays, I let myself be a bit more free when I use the materials, since it's clear that I have nearly a lifetime of craft materials hoarded away. Do I get tempted now and then? Of course I do, and I do end up buying some more stuff. The difference is now I give myself more permission to use and misuse the things I buy, so as to continue to gain the benefit of experience rather than the short-lived one of acquisition. There were times when I wasted some stuff by making some real fugly things, but I was also rewarded at many other times with something that just looked good. It is those times I look forward to, because those remind me what life's experiences are all about. They are about experiences and not products. 
 

Sunday, July 31, 2016

Small Changes

#outofthepagesiread

One magazine I love buying is Flow magazine. Published by 2 Dutch ladies and translated into English, it has articles on simple living, features on creative artists and comes with beautiful paper goodies, yay :) 

The current issue has an article on small changes that spoke to me.

Many people have big dreams stemming from current dissatisfactions. When we are dissatisfied with our house, job or partner, we make big dreams for ourselves in which we shed off all vestiges of our previous life and start afresh. So we might sell the house and move to a hut in Bali, or break up with the partner and move to France to find a new lover. 

Of course, once I read this, I immediately saw myself in it. Because every time I face a tough time at work, or I find myself dragged out of bed before dawn, I wish that I was doing something different. I wish that I was running my own art school, or writing books or just being a jobless bum at home. 

Whether such solutions solve my problems or not does not feature in my fantasy, of course. That's the point of a fantasy after all, to make you feel better by letting you dream. 

The article gives a different idea: that you don't have to take such big steps to making yourself happy and that small steps can be enough. Not everyone can afford drastic steps in their life, or should either. While I don't like the responsibilities that come with my job, I also appreciate very much that the monthly paycheck pays for my house and food while letting me save towards the future! That is not something I might easily get should I decide to quit and write a book!

The dream image though may represent a certain longing that is not being satisfied in your current life. According to the Self-Determination Theory, there are 3 basic needs to be fulfilled to make yourself happier. They are:

1. Autonomy - The need to do it your own way
2. Relatedness - the need to feel connected to other people
3. Competence - the need to do something you are good at

Taking the example of my own life, why is it then I feel dissatisfied at my job? First, the autonomy needs are not met, because much of what I do with the kids are determined by others. The competence needs are not met, because the job requires much planning and meticulousness that I struggle with. And it being a big place, my relatedness needs are not met as well either.

This is also why quitting it all to work on creative pursuits also seems more appealing. I get to do things my own way, paint what I want, write what I want (autonomy). I can meet other likeminded people who share the same creative dreams (relatedness). I can do something I feel I am good at (competence). 

But I don't always have to quit it all in order to pursue these needs. Small changes can also be taken as well. I already pursue the competence need by writing and painting in my free time. I pursue the relatedness need by meeting with friends and blogging and posting photos on Instagram. 

The autonomy needs... ah, that's a tougher nut to crack. There are commitments of time here that need to be fulfilled. I can meet this sometimes by taking the afternoon off to go on a photowalk, for example, but it's not something I can do every day. 

Here, the article talks about thinking in terms of solutions. Rather than paying attention to what's wrong with my life, what can I do then to make it right?

The example given is that of a big miracle. Imagine a big miracle happened and I don't have to work any more. What would I do? 

Well, I can imagine long afternoons reading at the library, painting at home or exploring the town with my camera. 

Do I necessarily need to quit my job to do this? Actually, I don't. I can spend some afternoons doing these, but planning is required. I would need to plan in advance which days I can get away with leaving the marking at the desk or having nothing at all. Or maybe even play hooky sometimes, hehe. 

So there is a solution. The solution is to plan the days I want to do this and then make sure nothing in my afternoon interferes with this plan. And it is a solution that allows me to keep my job and my salary. 

My thoughts on this article is that it is a bit simplistic and optimistic at the same time. Simplistic because it's not as if a solution can be found to all of every one's problems. I'm lucky enough because I still have flexibility when it comes to my afternoons, but not everyone who is stuck working 9-5 has the same luck.

But yet, optimistic because it tells you that it is possible to find happiness in the littlest of things. It's not always that you have to make drastic changes to find happiness but if you are aware of what makes you happy, you can make small changes to work towards that happiness. It's something that I try to carry out on a weekly basis and I do see an overall increase in happiness when I did so. 

Here are the small steps to do the same:

1. Identify the needs you are lacking. Autonomy, relatedness or competence? Look at your big dream. What is it about it that appeals to you?
2. Create spaces to fulfill those needs in your life. Where can you make time for it? What steps would you need to take?
3. Think in terms of solutions, not problems. It's about what you can do, not how much it sucks.
(adapted from Flow magazine, Issue 14)

Sunday, July 24, 2016

Out of the pages I read....

I'm a magazine buyer and hoarder. I love to browse the magazine racks to look for interesting articles and I don't mind spending money on some of the more expensive overseas publications. I do feel the money for the articles is worth spending on because of the quality of the writing. Many of them are also smart enough to manage their content so that what is published on paper is different from what is published online. 

And anyway, isn't it nicer to read on paper than on a screen? ;) 

But at the same time, I do wish that I could get more learning out of the magazines I read. I find sometimes that after reading, the magazine goes into a bag to be thrown away or given away. How would I know that I am retaining the information that I read or even applying them in real life?

So I thought of a plan, namely the

The 3-Stage Magazine Cycle (#outofthepagesiread for a nicer title)

Stage 1: Buy and read
The easiest stage of all, requiring the least effort, haha. 

Stage 2: Read and Do
The hardest stage, because this requires an action to derive something tangible. For the arty magazines like Daphne's Diary, Flow or Mollie Makes, this can be in the form of an art project. For magazines with stories like Frankie, this can be a piece of fiction. For non-fiction like Psychology Today, more essay-style articles. 

(Sounds easy, but the thought of the work involved sends me into shivers actually)

Stage 3: Sell
Just to extract that one last value, attempt to sell the magazine on Carousell and put some funds towards, er, the next magazine. :p Anyone who wants to support me in this step is welcome.......

Mind you, I prefer to do this for the more expensive foreign publications. I think local stuff like 8 Days is cheap enough for me to just read it la.

And another thing,

Why Do I Even Bother?

Firstly, I think it's a great way to get inspiration for art or writing projects. Some magazines like Daphne's Diary and Frankie have beautifully done pages and articles and there have been a number of times I have been inspired by what I read. But I don't always act on them and in the end, no product at the end. So it's a good way to exercise creative muscle.

Secondly, some of these magazines have great information that can't be found locally. Psychology Today has well-researched articles from universities and scientific institutions and it's all very up-to-date. This is information I want to share and remember and writing about it is one way to do so.

Thirdly, I'm hoping this would cut down on mindless magazine buying. Yes, the amount of money I spend on these publications is crazy, sometimes. Sometimes, I even find myself buying them simply because it's a habit to do so. I did this for Oh Comely, till one day, I realized the articles were inciting lesser interest in me and I decided to stop buying it altogether, unless a feature was particularly interesting. 

What's my chance of success?
Right now, I think the difficulty level is very high! Doing craft and writing takes time to do properly, and I'm not sure I can do enough activity at Stage 2 before I buy the next issue! Not only that, but from my short stint selling on Carousell, I also know that Stage 3 also takes up a fair amount of time! Would the money earned back be even worth the effort of trying?

Yet, 

The first reward only comes with the first step.
If I don't even make the first step to try because I was convinced it would utterly fail, I would not get anything at all. At least by starting on it, I can learn something out of it even if I fail miserably. At the very least, maybe it would make me think twice about indiscriminately buying more magazines.

And I already have the first reward, which is a blog article about the plan! Who knows if someone else would stumble onto it and get a great idea to do it? That'll be nice, to think that I passed a good idea along. :) 

So wish me luck! I'm going to start with the first article soon so I can get things done before the next issue comes out!

Saturday, April 16, 2016

Upcycled Journal Box

I have a problem with hoarding paper and journals. The potential for great works in a blank notebook always seems slightly hedonistic to me. Because of this, I have small piles of notebooks on my desk that can avalanche at any minute. I force myself to purge and organize at particularly threatening times but there are some that have to stay on my desk for easy access when I'm scrapping or crafting. 

Rather than let them pile up and fall, I decided to make something that would let them all sit nicely on my desk. A friend of mine recently gave me a gift from her holiday which I loved, but when I saw the box it came in, ideas sprung to me.

(Another problem with me: I see all kinds of potential in things people would just throw to the karang guni man. I like to pick them up. -_-!!)

Here's my craft project then, the upcycled journal box.

Sidetrack: here's the cute gift that was in the box, a colour-changing Snoopy mug! ( I finally got a dog present! )

Upcycled Journal Box

Materials needed:
- Box
- Decorative paper (mine came from an issue of Flow Book for Paper Lovers. I highly recommend the magazine if you like cutting and pasting paper. Check them out. It's also available at Kinokuniya and Allscript. )
- Pencil
- Scissors
- Glue
- Stickers (optional) 

Steps
1. Cut away the portions of the box you don't need. I wanted a curved opening so I drew one on the box and cut it away. I also cut away the side flaps. 


2. Place the box on the back side of the decorative paper. Trace out its shape. 

If you cut a curve like I did, I recommend leaving roughly an inch allowance. See where my finger is pointing?

3. Along the curve, cut slits so that it looks like you have little bricks all along the curve. 

4. Place glue all along the back side of the paper, especially the parts along the lines. Then press the box onto the paper. The front half of your box is now complete.

Here is why I cut the little 'bricks' for the curve. You will find it easier to press down the paper onto the box if you do so.

5. Repeat the same steps 1-4 for the back of the box and you are done!

Tadah!!! Completed box!

6. (Optional) I pasted some stickers from my Flow Book for Paper Lovers as decorations.


Here is the finished box, sitting prettily on my desk with my small journals inside. 
 
It's telling me that no matter how much clutter I have, it's gonna be okay. :)